Navigation: Loans > Loan Screens > Transactions Screen Group > EZPay Screen > Using the EZPay Screen > Step 1: Payment Methods >
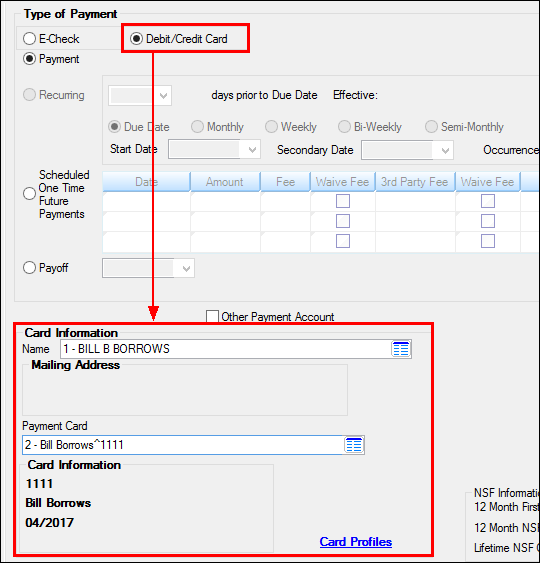
If Debit/Credit (or just plain Debit or Credit, depending on your institutions card settings) is selected as the payment method (if the user has proper field level security to do so), use the Card Information field group on the bottom-left corner of the screen (shown below) to indicate information about the card that will be used for making the payment. There are two possible ways to make card payments: Using a saved payment card or manually entering a card's information. Instructions for each option are provided below.
|
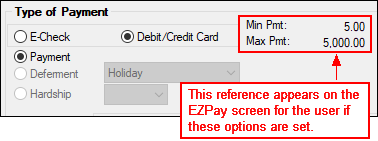
Note: If your institution uses the Credit Card Min/Max Pmt (EZCCMN)/(EZCCMX) options, the minimum and/or maximum card payment amounts allowed will be displayed to the right of the radio buttons, as shown below:
 |
|---|
Warning: Certain third party card processors won't accept card payments for accounts with an APR above a specified value. If your institution uses such a processor, ask your GOLDPoint Systems account manager to use the High Interest fields on the GOLD Services > Merchant ID screen to designate an alternate processor for high APR payments. If those fields aren't used, the card payment option on this screen will be disabled and only ACH payments will be allowed. |
|---|
Once the desired payment method and card information are selected, proceed to Step 2: Payment Types. If you encounter any error messages during the payment submission process, see Troubleshooting for information about how to resolve them.

Loans > Transactions > EZPay Screen with Debit/Credit Method Selected
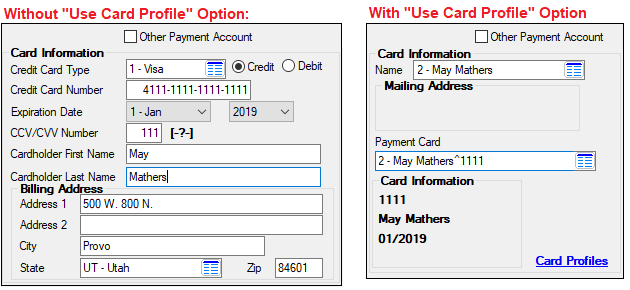
Cards can only be saved in the system if your institution uses card profiles (the Use Card Profile (EZUPPO) option must be enabled). Refer to the example screenshots below to see how the Card Information field group changes appearance depending on the status of this option.
If your institution uses card profiles (and if these fields appear as they do in the right screenshot below), Use the Name field in the Card Information field group to indicate the name of the person making this payment. The Mailing Address attached to the selected customer will appear below the Name field (this name and address information is managed on the Loans > Marketing and Collections screen > CIF tab). Once a Name is indicated, select the Payment Card that will provide the funds for the payment. The Card Information for the selected card will appear below the Payment Card field when a card is selected. The cards available in the Payment Card field are set up through the Card Profiles dialog. If the desired card does not appear in this field, click the Card Profiles link and enter the card information on that dialog.
 |
There are two scenarios in which manual card entry will be used:
•Your institution does not use card profiles (the Use Card Profile (EZUPPO) option is disabled), therefore you are not set up to save card information in the system.
•Your institution normally uses card profiles, but you wish to manually enter an alternate card for the payment (the person making the payment is not listed, the customer is paying from a one-time only card, etc).
If the case of the first scenario, you will need to use the Card Information and Billing Address fields to manually enter all information about the card and customer (see left screenshot below). Using the provided fields, enter the Credit Card Type (Visa, MasterCard, Discover, American Express), Credit Card Number, Expiration Date, CCV/CVV Number, and First and Last Name information for the card that will be used for the payment. The Billing Address information for the card must also be provided. Use the radio buttons to indicate whether the card is a Credit or Debit card.

In the case of the second scenario, mark the Other Payment Account checkbox field (shown below; not available unless the EZPay Non-Signer option (EZEPNS) is enabled). After that, entering the card information proceeds identically to the first scenario explained above.
|