GOLD ExceptionManager Screen Group |
  

|
Navigation: GOLD Services Screens >
GOLD ExceptionManager Screen Group |
|
The GOLD Services > GOLD ExceptionManager screen group contains information and options relating to your institution's ExceptionManager settings.
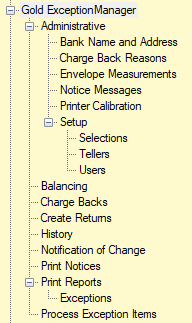
For ease of use, this online help is designed to match the layout of GOLD Services screens in the CIM GOLD tree view, as shown below:
GOLD ExceptionManager Overview
GOLD ExceptionManager (GEM) is designed to process exception items failing to post to deposit and loan accounts through inclearing checks, ACH, ATM, POD, lockbox, and automated loan payments. When an item is received and it cannot be posted to the account because of holds, balances, dates, etc, the system sends that item to GEM, where you can quickly view, report, process, and print customer notices for exception items. This system includes balancing capabilities and the option to allow users to enter manual return items, chargebacks, and notifications of change. Exception items are stored on the system for 60 days and then deleted.
You must be set up with proper security in order to use GOLD ExceptionManager. Security determines what can be accessed by each operator and is set up by your institution’s security officer. For more details on setting up security for GOLD ExceptionManager, see GEM Security Setup.
Suggestions for Using GEM
GEM is made up of three components:
1.The first allows you to take actions on exception items through the Process Exception Items screen.
2.The second component prints reports of the exception items.
3.The third component prints paid and return notices for the exception items.
Feel free to adapt the system to your institution's own way of doing things. The following steps are daily procedures recommended by GOLDPoint systems for using the GEM system:
1.Download exception items. Before you can process exception items, you must first download them. You can download exceptions from the previous night or a date you specify. See the Process Exception Items screen for more information.
2.Balance the exceptions file using the Balancing screen.
3.Print all exception items or make decisions online. Print a report that shows all exception items from the previous night's processing. You will need to print a report that is applicable to the exceptions you want to process. For example, if you are in charge of processing the ACH exceptions, then you would print a report that only includes ACH items. Your security administrator can set up specific selections for your institution's needs. For information on how to do this, see help for the Selections screen. This report will be used as a check-off list for Step 4 below. For instructions on how to print the Exception Item Report, see Exceptions.
You can also designate an employee at your bank to make online decisions on how to handle each item. That person can mark each item on the Process Exception Items screen by selecting the Decisions Only radio button in the Current User box, then applying those decisions to the exception items. Another employee can then perform those decisions. Security must be set up for each employee to do this.
4. Decide how to handle each item. On the Exception Item Report, review each item and decide how you would like to handle it. Some items may not require any action. Others may require a combination of the options below:
•Post with fee
•Post, no fee
•Return with fee
•Return, no fee
•Bank of First - Deposit (only for returned checks)
•Charge fee
•Disregard
Each exception without a status must have an action taken. Many institutions create a form of shorthand to mark their reports: R for return, RF for return with fee, P for post, C for charge, etc. If an item has no status, and you are not going to pay or return it, you must disregard it in order to balance the file. Once you have marked the report by hand, move to the next step of taking action on each exception item. You can also make decisions using the Process Exception Items screen, as described in step 3 above.
If a fee was already assessed to an item in the afterhours, you will not be able to assess another fee to that item. In fact, you will not be able to do any actions that have already been performed to that item. You can, however, correct the current status and reprocess the exception item.
5. Take action on each exception item. Each exception item requires an action. Possible actions are listed in step 4 above. For more information on actions, see the Process Exception Items screen.
6. Print inclearing returned checks report. For inclearing checks that are returned, you can either fax or email your return items to your correspondent (e.g., FISERV, Union Bank, FHLB, etc), or GOLDPoint Systems can send a transmission to your correspondent for you (if that option has been set up for your institution). For more information on how to print an Inclearing Returned Checks Report, see Exceptions.
7. Print full report for records. You may want a hard copy of the actions the system performed and a record of the exception items for the day. After 60 days, exception items are deleted in the system, so a paper copy will be the only record your institution has of any exception items after that time span. For more information on how to print a full report for your records, see Exceptions.
8. Print overdraft, return, and paid notices. You can print overdraft, return, and paid notices for customers. For more information on how to do this, see Print Notices.
GEM Screens in CIM GOLD
Follow the links below for more information about the screens in GOLD Services > GOLD ExceptionManager: