Navigation: GOLD Services > GOLD Services Screens > GOLD ExceptionManager Screen Group >
Use the GOLD Services > GOLD ExceptionManager > Print Reports > Exceptions screen to print a report of all actions performed in GOLD ExceptionManager (GEM) and a record of the exception items for a single day or range of days. Exception items are stored on the system for 60 days and then deleted. For more information about afterhours reporting on exception items, see Exception Items Report (FPSDR096) in DocsOnWeb.
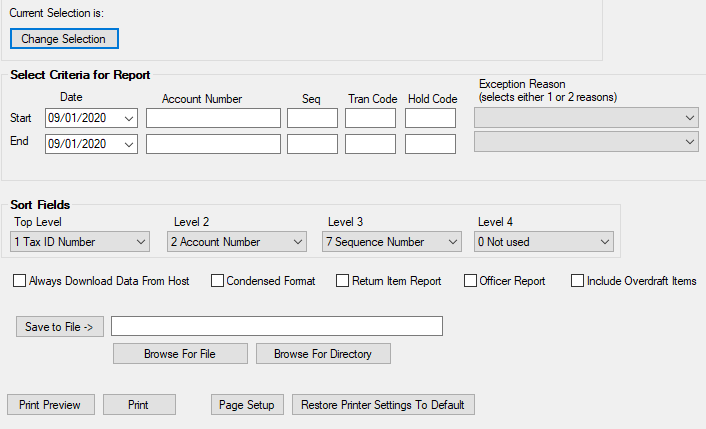
GOLD Services > GOLD ExceptionManager> Print Reports > Exceptions Screen
To print an exception report from this screen:
1.If the Current Selection is not what you want to use, click <Change Selection> to open the Selections screen as a separate window. Select the desired exception item source in this window (see the linked help for more information about the functionality of that screen).
2.Enter a Start and End range for Date, Account Number, Seq number (EISEQU), Tran Code (EITCOD), and Hold Code (EIHACC). You can also indicate one or two Exception Reasons to focus on specifically. Only notices falling within these indicated criteria will print.
3.Use the Sort Fields to indicate how you want the report to appear. The item you select from the Top Level drop-down field will appear first, Level 2 will appear second, Level 3 will be third, and Level 4 will be fourth. If the Include Overdraft Items checkbox on this screen is marked and the overdraft amount code is set on the Deposits > Account Information > Overdraft & Secured Loans screen, the Top Level sort field must be set to tax ID number, account number, primary reason, or sequence number in order to show the overdrafted amount total in its correct location. Exception items that are paid through an overdraft account are not included with the exception report unless Include Overdraft Items is marked.
4.Mark the Always Download Data From Host checkbox if you have not refreshed the items before accessing this screen. You should not print notices until you have the most current data.
5.Mark the Condensed Format checkbox if you want to print the exception items report with a condensed format. This report shows limited information, printing one line per account. See an example of this format at the bottom of this screen.
6.Mark the Return Item Report checkbox if you want to print the exception item report only for exception items that were returned. Exception items can be returned through either the Process Exception Items screen, or they can be created to return manually using the Create Returns screen. This report shows limited information, printing one line per account. This report prints the sequence number, account number, name, check number, transaction amount, reason for the exception, trace number, and source of the exception item. See an example of this report at the bottom of this screen.
7.Mark the Officer Report checkbox if you want to print the exceptions report in summary format for accounts connected to officers at your institution. Accounts with an officer indicated in the Account Representative Code and Name field on the Deposits > Account Information > Additional Fields screen will be reported. If this field is blank, accounts will not be included in this report. See an example of this report at the bottom of this screen.
8.If you want to save the report to a directory, you can find the directory to save it in by clicking <Browse For Directory>. If you want to save the report to a specific file, click <Browse for File> and then select it. Click <Save to File> once you've established either a directory or file, and the report will be saved to the selected location.
9.To print the report directly to a designated printer, click <Print>. If you want to preview the report before printing it, click <Print Preview>. Clicking <Page Setup> allows you to establish the page format before printing the report. See an example of this report at the bottom of this screen.
Report Examples
Remember that if names, phone numbers, and other information concerning the account owner are displayed with asterisks (*) (as is shown in the example above), the Show Sensitive Data checkbox is not marked on the Tellers screen.
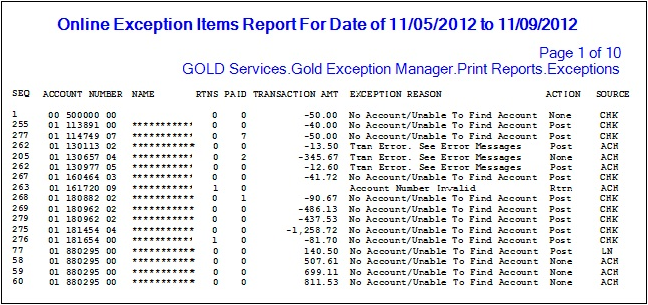
Condensed Format
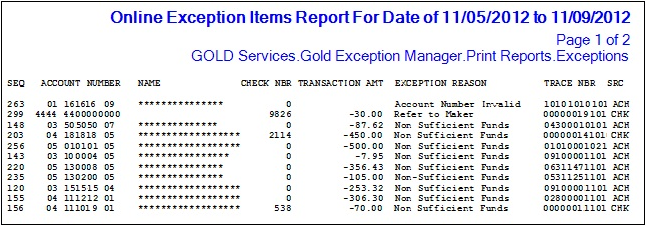
Return Item Report
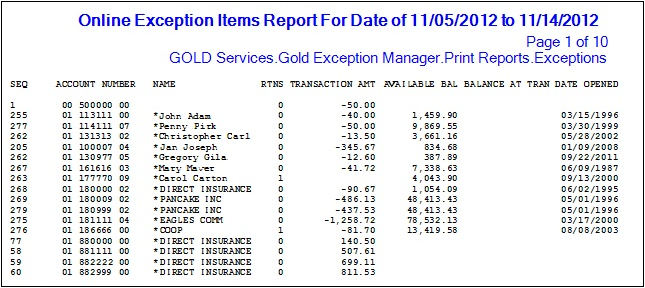
Officer Report
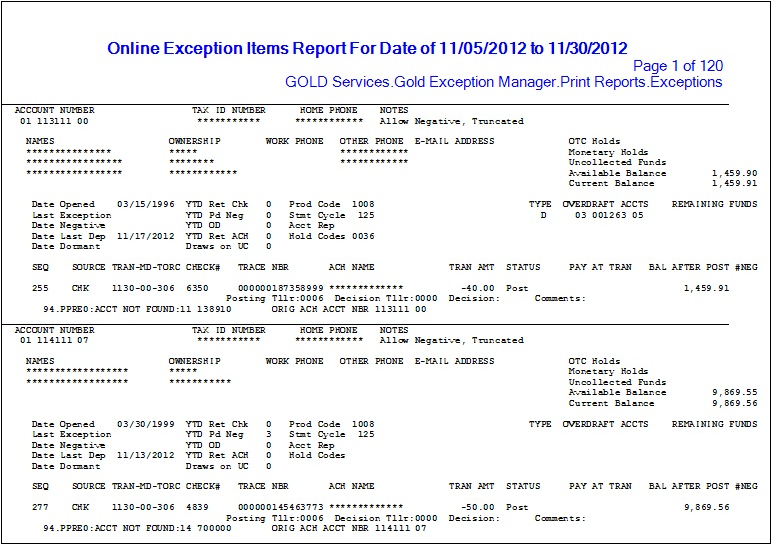
Exceptions Report
|
Record Identification: The fields on this screen are stored in the XMEI record (Exception Item Record). You can run reports for this record through GOLDMiner or GOLDWriter. See XMEI in the Mnemonic Dictionary for a list of all available fields in this record. Also see field descriptions in this help manual for mnemonics to include in reports. |
|---|
In order to use this screen, your institution must:
•Subscribe to it on the Security > Subscribe To Mini-Applications screen.
•Set up the desired field level security in the XMEI record on the Field Level Security screen/tab. |