The Report Wizard Step 4: Enter Row Selection Logic |
  

|
Navigation: How to > The Report Wizard >
The Report Wizard Step 4: Enter Row Selection Logic |
|
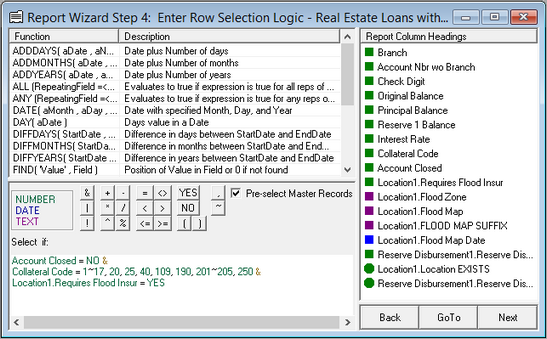
Step 4 of the Report Wizard allows you to enter row selection logic to determine which data should be pulled into the rows when the report is run. This is the step you would use to set up selection criteria. For example, you may not want accounts with a zero balance to appear on the report when it is run. You can use this step to create that logic.
This can be a very involved step. This step may require assistance from your GOLDPoint Systems account manager.
You could also export the file to another application such as Excel, and make your selection criteria in Excel. This would require knowledge about Excel.
Probably the best way to describe this step is with some examples.
| 1. | Using fields from the Report Column Headings (from Steps 2 and 3), the operator buttons, and the functions in the top left pane, enter a logical statement that can be determined to be true or false. |
| It's helpful to put each criteria on its own line and connect them with the |

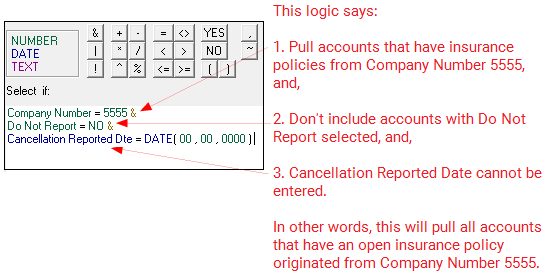
More Examples:

When you have entered the row selection logic to determine which criteria the system will use to sort accounts into the report, click <Next> in the bottom-right corner of the screen. Step 5 of Report Wizard will appear.
See also:
Example of How to Create Row Selection Logic
Appendix A - Special Calculations
Appendix B - Special Loan Field Mnemonics