CIM GOLD Profile tab |
  

|
Navigation: Security Screens > Setup Screen >
CIM GOLD Profile tab |
|
Use the fields on the CIM GOLD Profile tab of the Security > Setup screen to set up profile security. This tab is only available if the CIM GOLD Profiles radio button has been marked on the screen.
Setting up a security profile is a way of grouping employees based on their job duties and security level. Employees are set up by sharing a security profile for job duties that require the same security clearance. A profile is set up one time under a profile name and/or number and then linked to all employees that require the same security access. For example, the security access for all tellers could be set up under the profile name “Teller.” The “Teller” profile would then be linked to the Security Setup of each employee who requires access to the security given under the “Teller” profile.
Profiles save time because you set up security only once for a group of employees that would require the same security clearance. Also, if a security change is needed for a group of employees that share the same profile, you can change the security one time on the profile, rather than changing each individual employee’s security.
|
WARNING: Some users may be tied to a profile, or even two profiles, as well as have their own personal security settings. The system allows the highest security options available to that employee based on their profile or user security settings. The ranking of security settings are:
•Highest - Maintain •Middle - Inquire •Lowest - None
For example, employee Sally is tied to two profiles, Teller and Accounting, as well as her own security settings.
•The Teller Profile restricts Sally from accessing the Customer Relationship Management > Households screen (security setting for that screen is set to None).
•The Accounting Profile allows inquiry-only access to the Customer Relationship Management > Households screen (security setting for that screen is set to Inquire).
•Sally's personal security is set so that she has file maintainable access to the Customer Relationship Management > Households screen (security setting for that screen is set to Maintain).
In this example, Sally would be able to access the Households screen and view, create, and make changes to households based on her personal security settings, even though the two profiles she's connected to would either not allow access or allow inquiry-only access.
See the System Profile tab for more information on how to set up System Profiles.
Also remember that field-level security can be restricted based on employee or profile. |
|---|
|
Tip: Before making any changes to security, the Display Effective Security box on the Security > Setup screen must be unchecked. |
|
Tip: Changes to security requires users to close down the application they are using and log onto it again before changes take affect. For that reason, we suggest you not update or change security until a time when no users are on the system. |
|
Note: GOLDPoint Systems account managers have inquiry-access only to institution security. We cannot release password violations or reset passwords for your institution at any time. A security administrator at your institution must handle these types of security issues.
•For password violations, see the Security > Password Violations screen.
•To reset passwords, see the Security > Reset Passwords screen. |
|---|
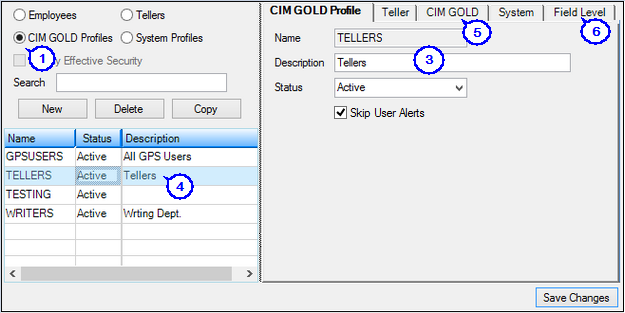
Use the fields on this tab to set up CIM GOLD profiles. Any CIM GOLD profiles that already exist on the system will be shown in the list view.
To create a CIM GOLD profile:
1.On the Security > Setup screen, select CIM GOLD Profiles and click ![]() . The Create a CIM GOLD Profile dialog box is displayed, as shown below:
. The Create a CIM GOLD Profile dialog box is displayed, as shown below:
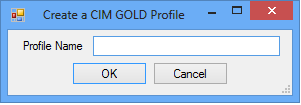
2.In the Create a CIM GOLD Profile dialog, type a new Profile Name and click <OK>. CIM GOLD profile names can have up to 12 characters and must be unique from all other profiles already set up in the Security system.
3.The CIM GOLD Profile tab appears, where you can give the new profile a Name, Description, Status, and indicate whether the selected profile will Skip User Alerts. The Name (which is a mandatory entry) should be the full name of the individual employee and can be up to 30 alphanumeric characters. The Status can be Active (profile currently in use) or Inactive (profile no longer in use, prevented from accessing any CIM GOLD screens).
If the Skip User Alerts checkbox is marked, the profile will not see any client-defined alerts (as a dialog or in the Alert Status field at the top of each screen in CIM GOLD). They will continue to see system-defined alerts (those alerts that occur automatically due to certain activity on the account, such as charge offs). For more information concerning client-defined alerts, see the Loans > System Setup Screens > Client Defined Alerts.
4.The new profile name will be added to the bottom of the profile list with the default “Active” status. The new profile name will also be added to the Interface Profile drop-down list on the Employee tab and can be selected for employees that will be tied to a profile.
5.On the CIM GOLD tab, select all applications and screens the profile will need to use, then click ![]() .
.
6.If you use field-level security restrictions, go to the Field Level tab, select restrictions for the profile, then click ![]() .
.
Security > Setup Screen, CIM GOLD Profile Tab
See also: