Actions |
  

|
Navigation: GOLD Services Screens > GOLD ExceptionManager Screen Group > Process Exception Items Screen >
Actions |
|
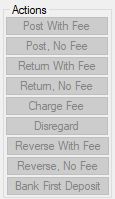
Each exception item requires an action. You can apply an action to the exception item by selecting the exception in the list view and clicking the appropriate button (<Post>, <Return>, etc) on the right side of the screen (as shown below). You can also right-click an exception in the list view and select the appropriate action from the pop-up menu (under Posting).
Additionally, you can charge a fee to the account for processing the action. Fees are set up on the Descriptors and Fees tab of the Institution Options screen.
Possible actions include:
Action |
Description |
Post With Fee |
This will process the specified transaction to the account(s) highlighted, plus charge the fee amount designated by your bank for posted items. |
Post, No Fee |
This button works exactly like Post With Fee (above), except that no fee is applied. If the exception reason is "94.NO ACCT OR UNABLE TO LOCATE ACCOUNT" or "99.ACCOUNT NUMBER INVALID," an incoming ACH record (FPDA) will be created for the transactions whey they are posted. |
Return With Fee |
This will return the exception item(s) to the account(s) highlighted, plus charge the fee amount designated by your bank for return items. The morning deadline is 10:00 MST.
On-Us check transactions (trancode 1130/6) can be returned, but they do not get sent to the FRB or another third-party processor since they originated with your bank. Chargebacks need to be created for these items. Your autopost needs to be set up to handle trancode 1881/06.
To return an item with a fee:
1.Click <Return With Fee>. A dialog box will display asking you to enter a return code.
2.Select a return code. Return codes are defined by the FRB. Return code R17, File Record Edit, will be returned with "QUESTIONABLE" in the addenda record. Duplicate check returns must be handled on your Fedline.
3.Click <OK> to return the exception item with the return code attached.
If you are returning an ACH item or a check processed by the Federal Reserve Bank (FRB), you must enter the ACH return code. These codes are designated by the FRB.
Once an item has been returned, an email can be sent to the account owner notifying them of the return.
You cannot return items on Federal Reserve Bank holidays. MICR check returns can be sent to the FRB twice a day. Both ACH and check transactions have a deadline for returned items. If it is past the deadline, you will not be able to return them until the next processing day. Institution options RTIM and ITIM are used for these deadlines.
To create a return item manually, use the Create Returns screen. |
Return, No Fee |
This button works exactly like Return With Fee (above) except that no fee is applied. |
Charge Fee |
This will charge a fee on the item(s) highlighted. If a fee has already been assessed, an error message will appear. |
Disregard |
This will be used for any exception item that you are not going to post or return through GEM. Every item listed on the screen must be either posted, returned, host posted, or disregarded. |
Reverse With Fee |
This function is only enabled for eACH returns. The Comments field on the screen will show "e.ACH 'XX-XXXXX-X" with the X's being the account number that was used to originate the eACH batch by a company using your website.
The transaction that was returned will be reversed from the originating account in the Comments field when the Reverse action is taken.
If you want to reverse the transactions for the selected exception items and charge a fee for reversing the transactions, select this function. |
Reverse, No Fee |
This button works exactly like Reverse With Fee (above) except that no fee is applied. |
Bank First Deposit |
The Bank of First Deposit (BOFD) is required in the file on every returned check. However, some checks are not sent to the FRB with this information, and they will forward the check to you without the required information. You must then send it back with the returned check data. The <Bank First Deposit> function allows you to add the BOFD information to the check in GEM. Once you select a check item, the button will be enabled if the item requires the BOFD information. |
You can also designate an employee at your bank to make decisions on how to handle each item. That person can mark each item on the Process Exception Items screen by selecting the Decisions Only radio button in the Current User field group, then applying those decisions to the exception items. Then, another employee can actually perform those decisions. Security must be set up for each employee to do this. See the May Make Posting Decisions option in the Security Setup help for more information.
To post, return, disregard, charge a fee, or create a Bank of First Deposit to an exception item:
1.After downloading exceptions, select all exception items that have similar actions you want to process in the main list view. You can sort by any column displayed. If a decision was made by your customers online using your Remote Banking website, we suggest you sort by the Decision column, and then handle the items according to the decision (see example below). For more information on how to include the Decision column on this screen, see Users.
•To select one exception item, left-click on the item with your mouse.
•To select multiple exception items, press <Ctrl> while left-clicking on each item you want to take an action on.
•To select all exception items, click on the first exception item listed, then press <Ctrl> plus <Shift> plus <End> simultaneously. All exception items will be highlighted.
2.Once you have selected exception items, apply an action by clicking on one of the action buttons listed on the right side of the screen or right-click on the selected exception items. Using your mouse, highlight "Posting" from the pop-up menu that appears, and another pop-up menu will appear. From here you can quickly select an action or correction you want to use for the exception item.
If for any reason the selected transactions cannot be processed, a Posting Validation Errors and Warning dialog will be displayed. Any sequence that cannot be handled will be listed in the dialog, along with the reason it can't be processed. If you click <OK>, the transactions that can be processed will process and the transactions with errors (e.g., "Account not found") will be marked with an asterisk (*). You will have to determine what you can do individually for those exceptions.
After processing an action on an exception item, the Status column in the list view will display the result of that action:
•P for Posted
•PF for Posted and Fee charged
•HP for Host Posted (automatically posted by the system in the afterhours)
•RF for Returned and Fee charged
•R for Returned