Navigation: Notification System > Manual Notification Handler Screen >
Use the Right-click Notification Pop-up screen to manually queue messages. Using this pop-up screen, you can set up email and text notifications to be sent to your customers.
This screen can be accessed on multiple screens throughout CIM GOLD using the Right-click Menu. This screen works similarly to the Manual Notification Handler screen.
Note: Field-level security for this screen is set up on the Field Level tab on the Security > Setup screen in CIM GOLD. You can control which employees can send alerts using the Right-click menu using the following field-level security options:
•Right Click Email (FSNEML): This field ensures that the option to send a notification e-mail using the right-click screen is inaccessible if the user does not have the proper security.
•Right Click Text (FSNTXT): This field ensures that the option to send a notification text using the right-click screen is inaccessible if the user does not have the proper security.
The following alert notifications can be set up using this screen:
To set up an email notification using the Right-click Menu Notification Pop-up screen:
1.Right-click on a screen in CIM GOLD to bring up the Right-click Menu.
2.Select Send Alert and then select E-Mail to send a notification as an email message.

Right-click Menu
3.This brings up the notification pop-up screen.
4.Select the template you want to use in the Template field and then set the date and time that you want the notification sent using the Release Date and Release Time fields.
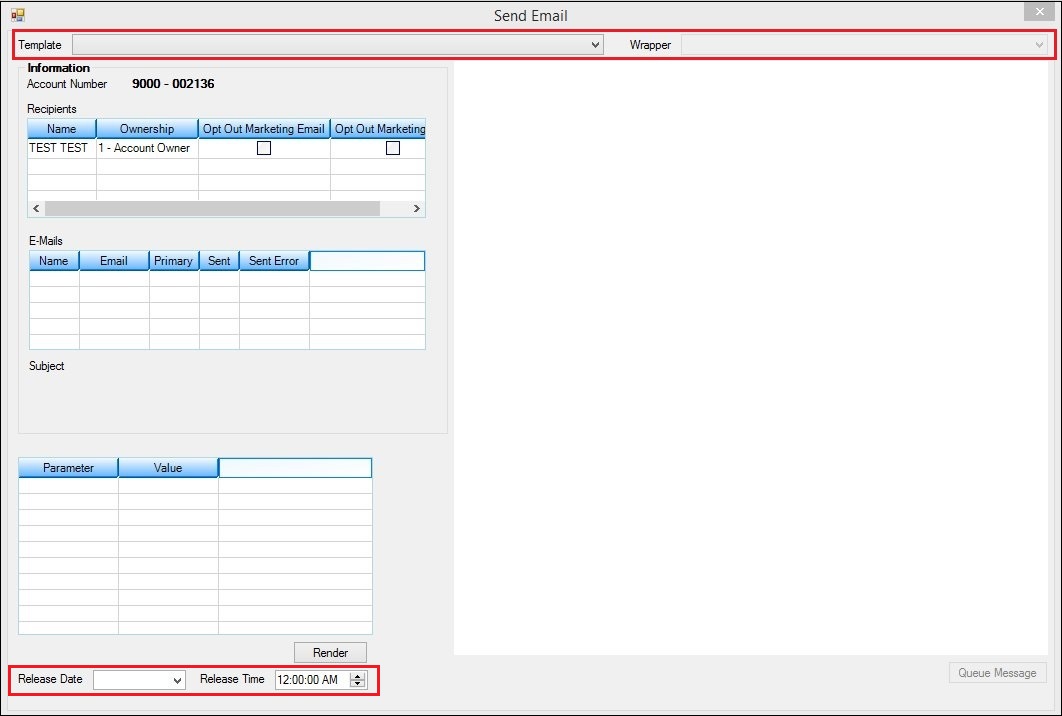
Notification Pop-up Screen—Send Email
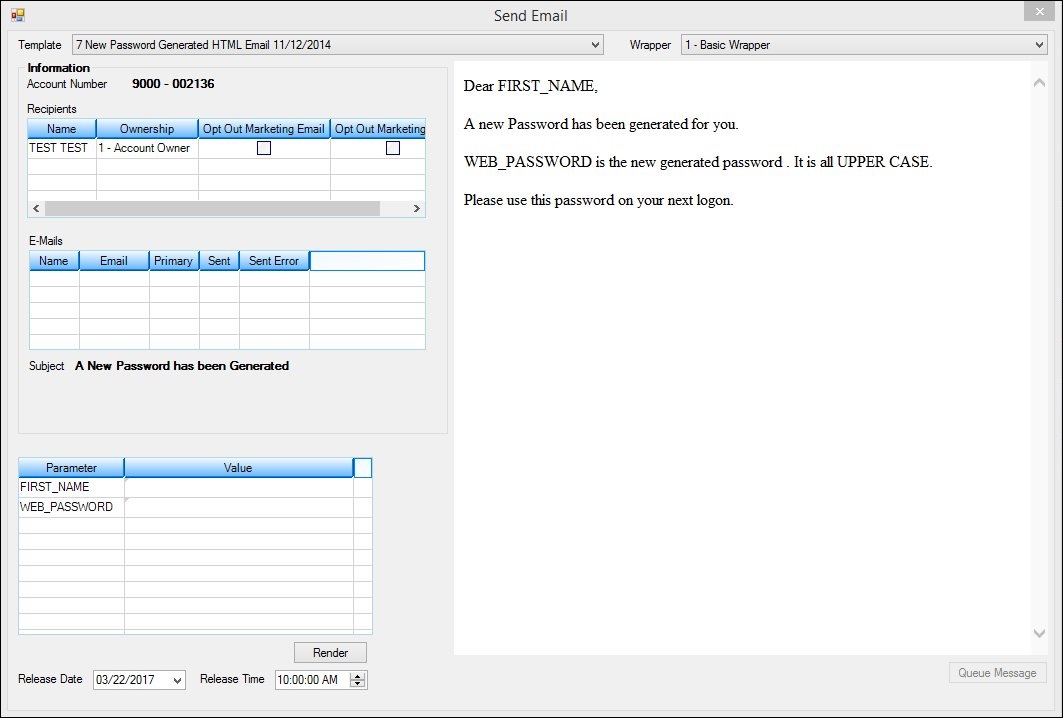
Template, Wrapper, and Release Date and Time Selected
5.Now select the person/entity that the notification should be sent to from the Recipients list view.
6.Then select the email address that the notification should be sent to from the E-Mails list view.
7.Enter the values for the parameters in the Value fields.
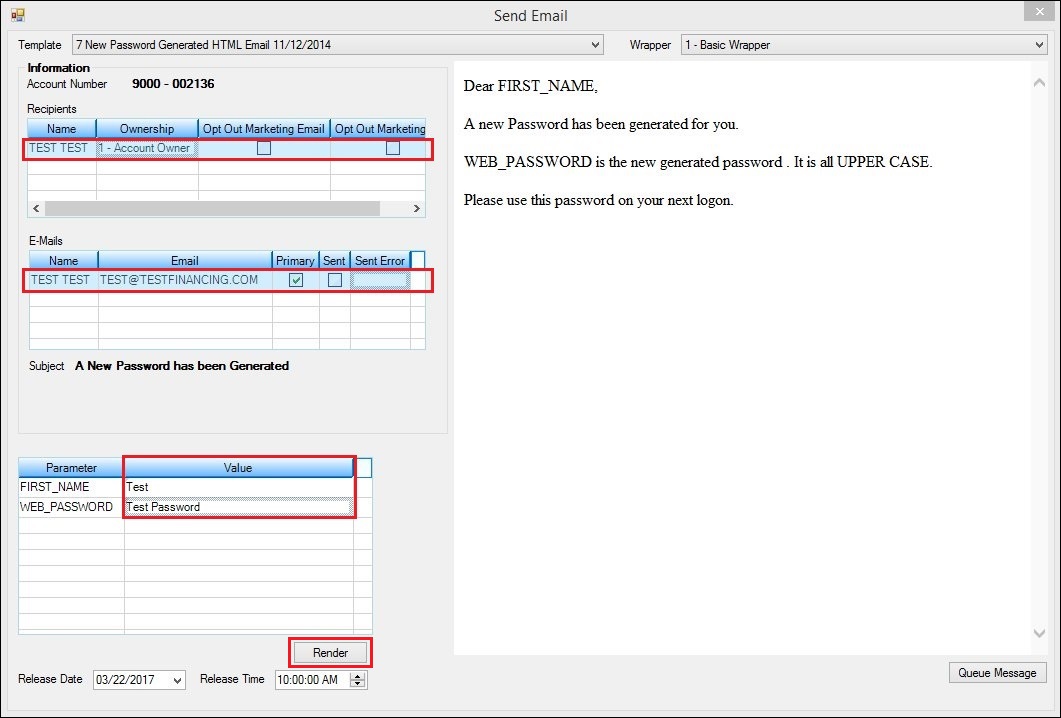
Account and Email Address Selected and Parameter Values Entered
8.When the notification is ready to be sent, click <Render> to preview the notification and ensure that it is set up correctly.
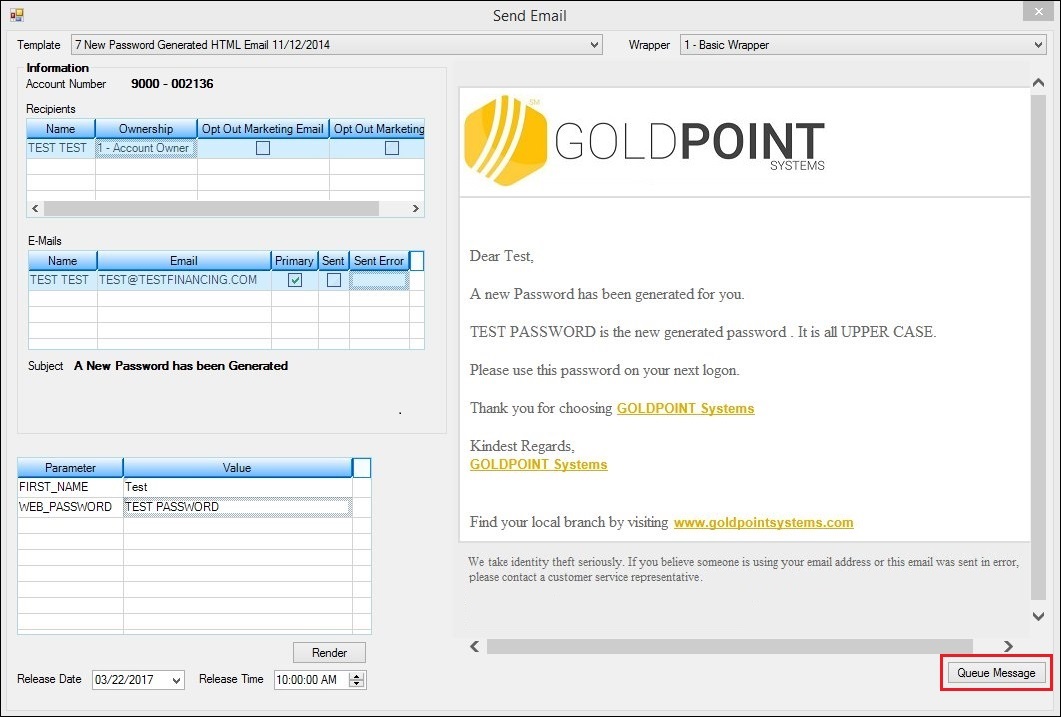
Notification Rendered
9.Once you have finished setting up the notification, click <Queue Message> to add the notification to the messaging queue.
10.The notification is then added to the messaging queue and will be sent according to the date and time selected in the Release Date and Release Time fields.
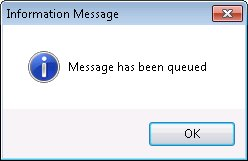
Message Queued Successfully
To set up a text notification using the Right-click Menu Notification Pop-up screen:
1.Right-click on a screen in CIM GOLD to bring up the Right-click Menu.
2.Select Send Alert and then select Text to send a notification as a text message.
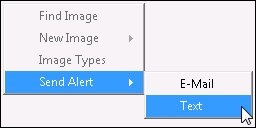
Right-click Menu
3.This brings up the notification pop-up screen.
4.Select the template you want to use in the Template field and then set the date and time that you want the notification sent using the Release Date and Release Time fields.
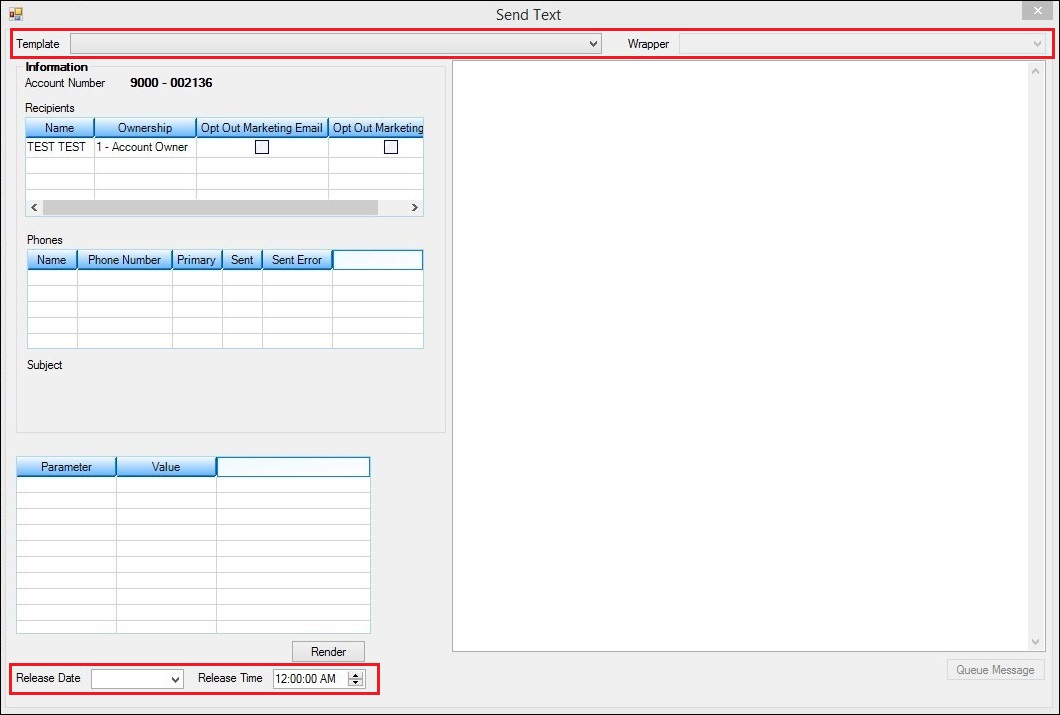
Notification Pop-up Screen—Send Text
5.Now select the person/entity that the notification should be sent to from the Recipients list view.
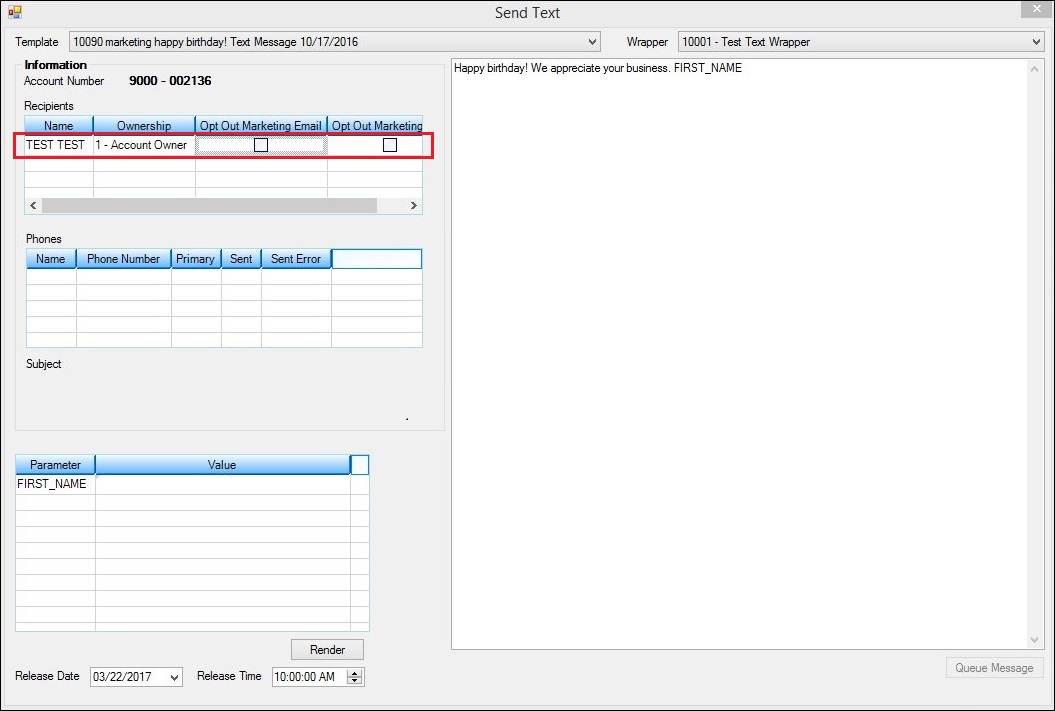
Template, Wrapper, and Release Date and Time Selected
6.Then select the phone number that the notification should be sent to from the Phones list view.
7.Enter the values for the parameters in the Value fields.
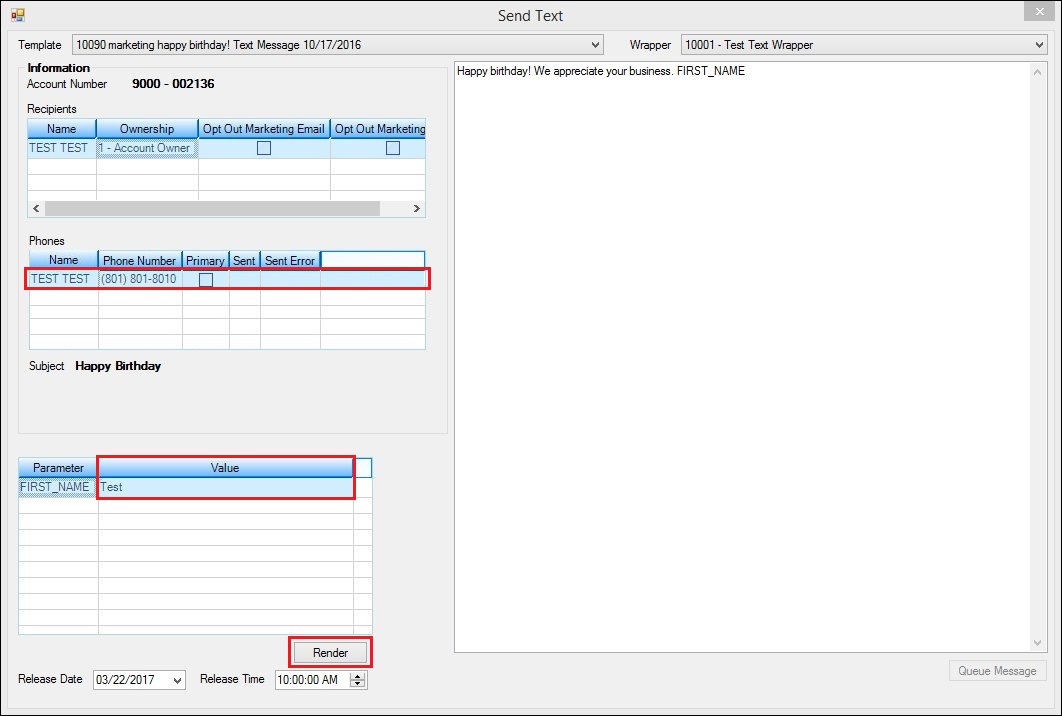
Phone Number Selected and Parameter Values Entered
8.When the notification is ready to be sent, click <Render> to preview the notification and ensure that it is set up correctly.
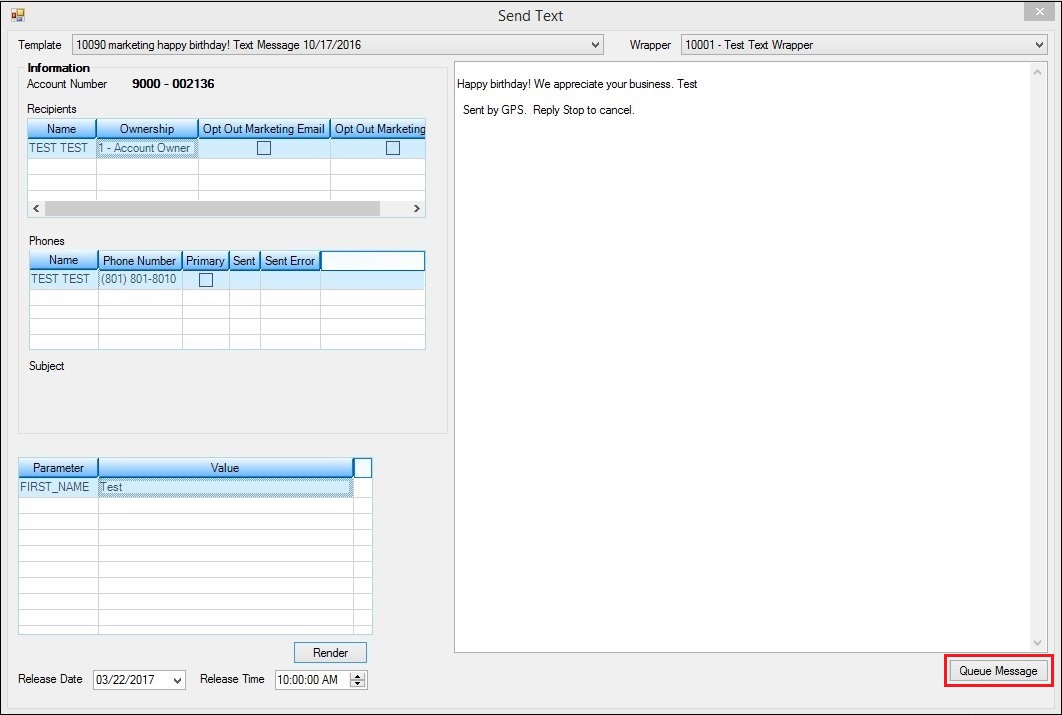
Notification Rendered
9.Once you have finished setting up the notification, click <Queue Message> to add the notification to the messaging queue.
10.The notification is then added to the messaging queue and will be sent according to the date and time selected in the Release Date and Release Time fields.

Message Queued Successfully
See also:
Manual Notification Handler Screen