Navigation: Notification System > Triggers Screen >
To modify (edit) a trigger using the Manage tab on the Notification Triggers screen:
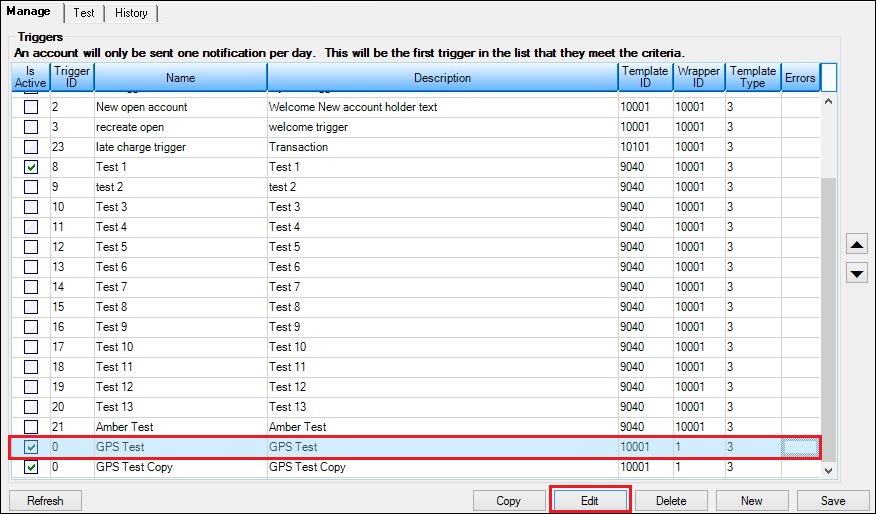
1.Locate the trigger that you want to modify in the Manage Triggers list view.
2.Click on the trigger to highlight it.

Trigger Selected in the Manage Triggers List View
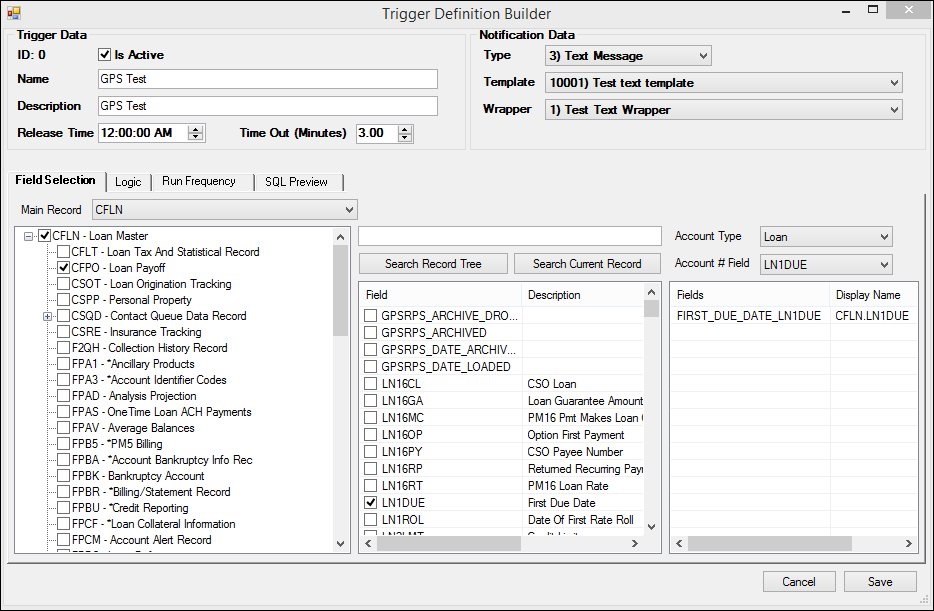
3.Click <Edit> to open the Trigger Definition Builder dialog with data for the selected trigger loaded.

Selected Trigger Loaded on the Trigger Definition Builder Dialog
4.Modify any of the fields on the Trigger Definition Builder dialog for the trigger.
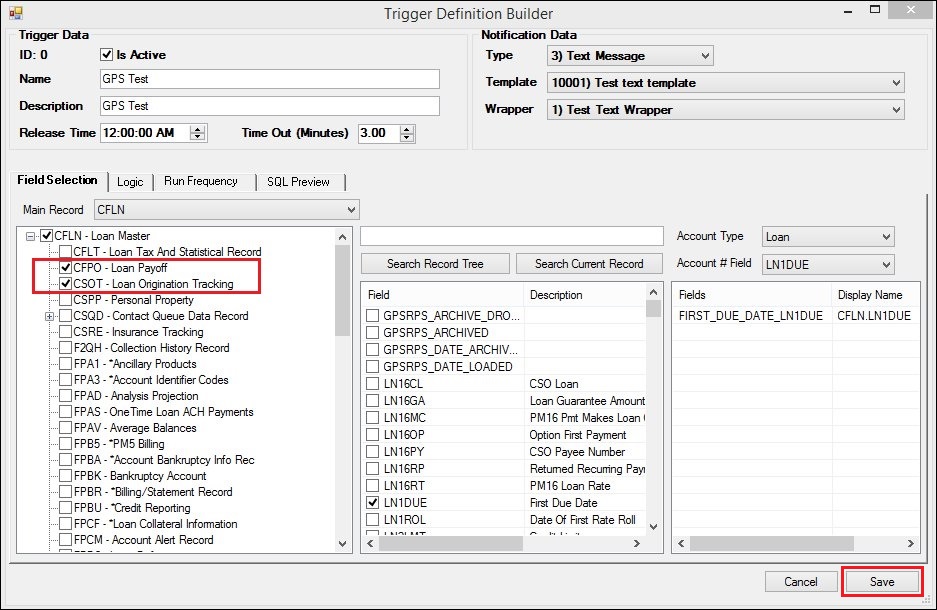
5.You can add or remove fields on the Field Selection tab. You can add, remove, or edit the logic on the Logic tab. You can change when the trigger is scheduled to run on the Run Frequency tab. And you can preview any of the changes you have made on the SQL Preview tab and in the Preview Notification section of the Logic tab. For our example, we are going to add another Loan Master field, CSOT - Loan Origination Tracking, to our trigger by simply checking the field on the Field Selection tab.
6.After you have made all of your modifications, click <Save> to save your changes to the selected trigger and return to the Manage tab of the Triggers screen. Note: You must also click <Save> on the Manage tab of the Triggers screen to save the changes that you have made.

Changes Made to Trigger
See also: