Navigation: Notification System > Triggers Screen >
Using the Manage tab on the Triggers screen, you can create a new trigger. There are two ways to create a new trigger:
•Copy a Current Trigger to Create a New Trigger
To create a new trigger using the <New> button, complete the following steps:
1.Click the <New> button on the Manage tab to bring up the Trigger Definition Builder dialog.
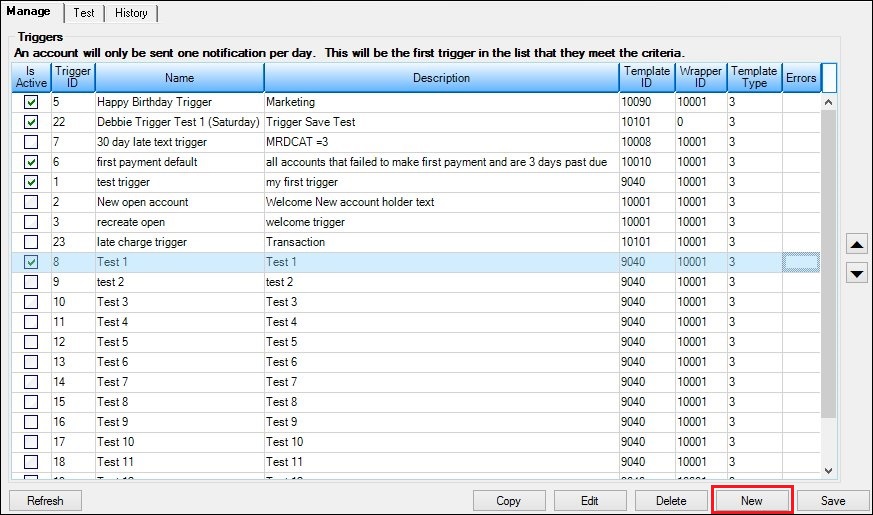
<New> Button on the Manage Tab
2.Enter information for the new trigger, including the Name, Description, Type, Template, etc, in the Trigger Data and Notification Data field groups. Make sure to input information in the required fields. The required fields are marked with an ![]() .
.
3.Next, select the Field Selection tab and select fields, account types, etc. for the new trigger. For example, you could select the CFLN - Loan Master record and the CFPO - Loan Payoff. Then you could select the LN1DUE - First Due Date field, etc. Note: The Field Selection tab contains required fields that you must modify. The required fields are marked with an ![]() .
.
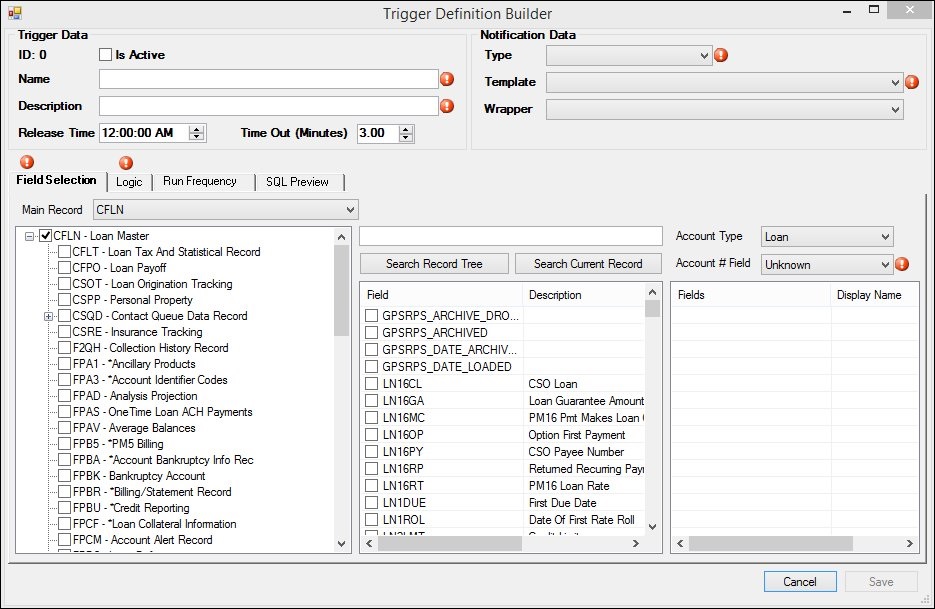
Trigger Definition Builder Dialog: Field Selection Tab
4.Now, select the Logic tab and enter the logic that you would like to use for the new trigger. The system will use the logic entered to determine who to send notifications to and when. For example, you could use the logic to tell the system to send a notification to anyone who is over 30 days late making a payment. The Logic tab also displays a preview of the notification that will be sent. Note: The Logic tab is required. You must enter logic on this tab to create a new trigger.
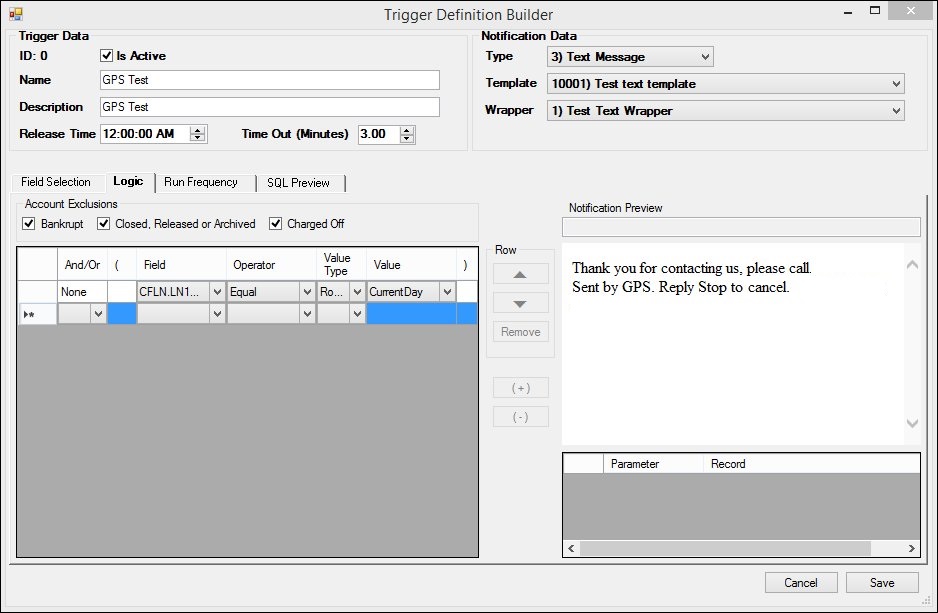
Trigger Definition Builder Dialog: Logic Tab
5.Next, select the Run Frequency tab and schedule when you want notifications sent for the new trigger. For example, you could schedule the trigger to send notifications at the end of each month.
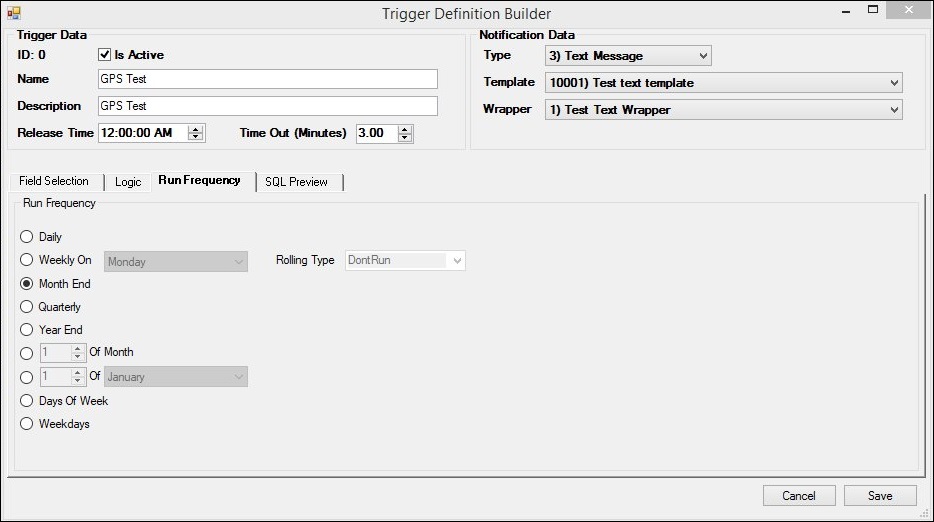
Trigger Definition Builder Dialog: Run Frequency Tab
6.Then, select the SQL Preview tab to view the SQL (Structured Query Language) that you have set up for the trigger. Make sure everything is set up correctly for the new trigger.
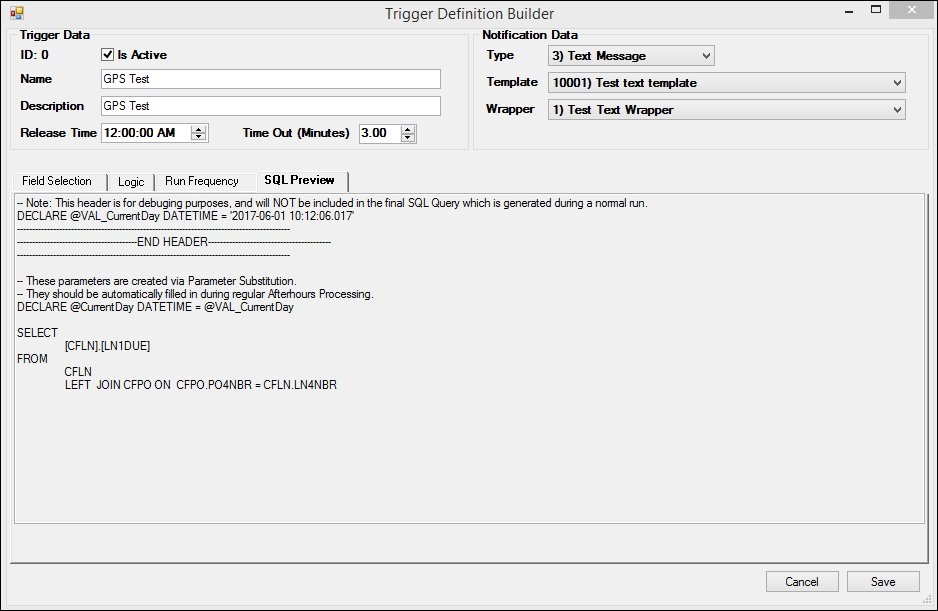
Trigger Definition Builder Dialog: SQL Preview Tab
7.Once you have entered in all of the data for the new trigger and have verified that it is set up correctly, click <Save> to create the new trigger.
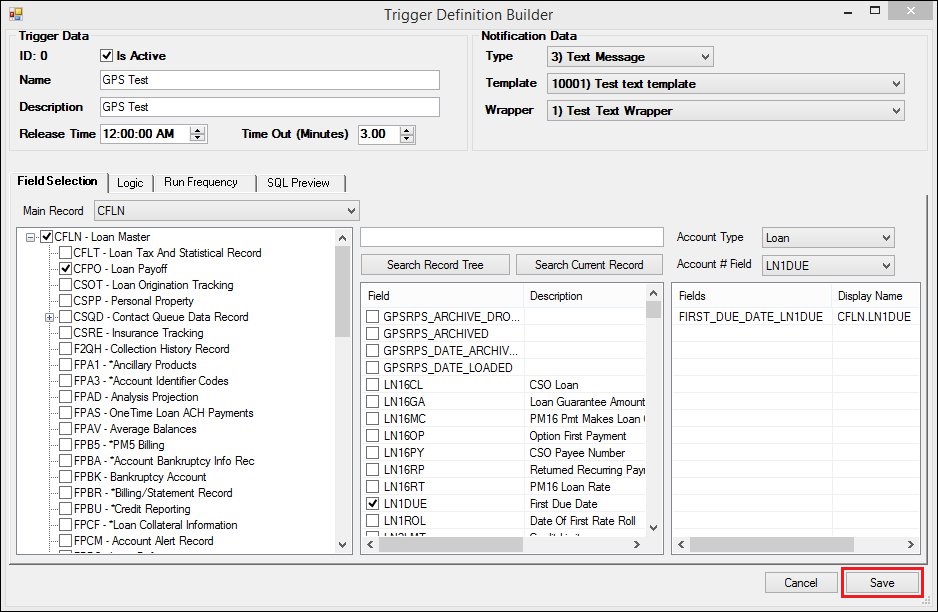
<Save> Button on the Trigger Definition Builder Dialog
8.The new trigger is created and appears in the Manage Triggers list view.
9.Click <Save> to save your changes and the new trigger.
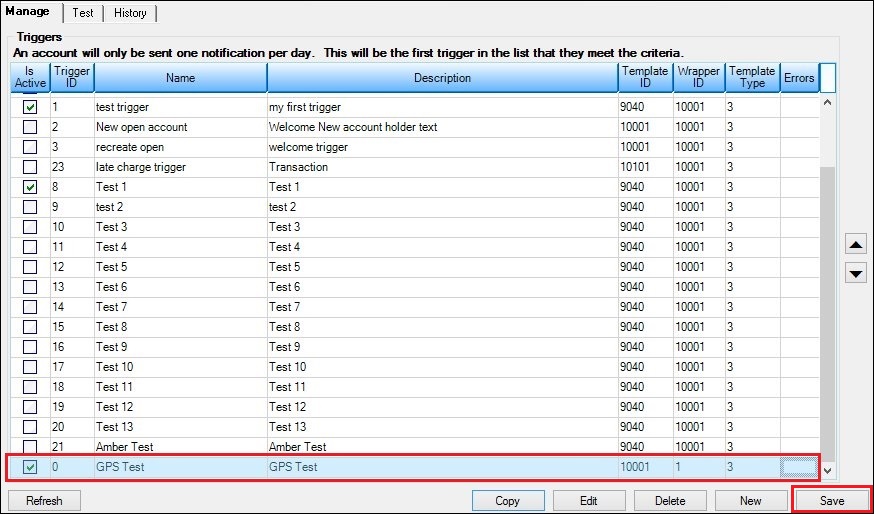
New Trigger Displayed in the Manage Triggers List View
Copy a Trigger to Create a New Trigger
To copy a current trigger to create a new trigger, complete the following steps:
1.Locate the trigger that you want to copy in the Manage Triggers list view.
2.Click on the trigger to highlight it.
3.Click <Copy> to bring up the Trigger Definition Builder dialog.
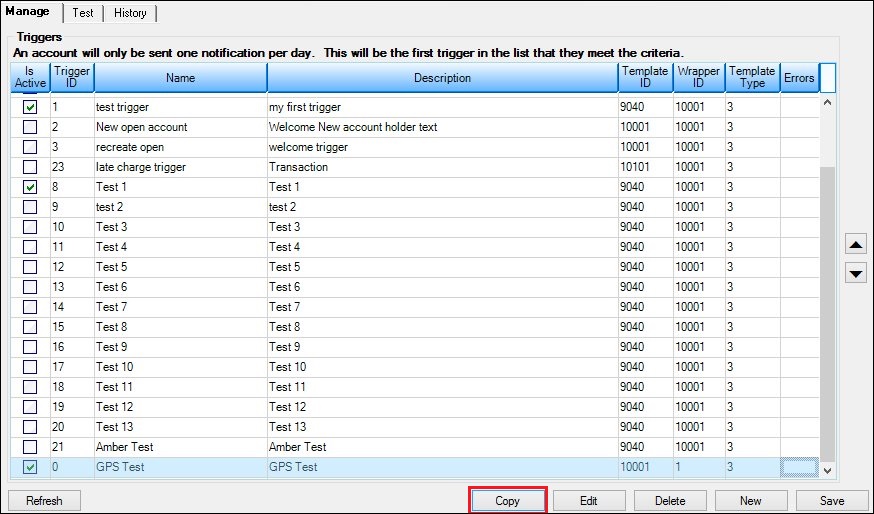
Trigger Selected and <Copy> Button on the Manage Tab
4.The Trigger Definition Builder dialog is automatically populated with Information from the selected trigger.
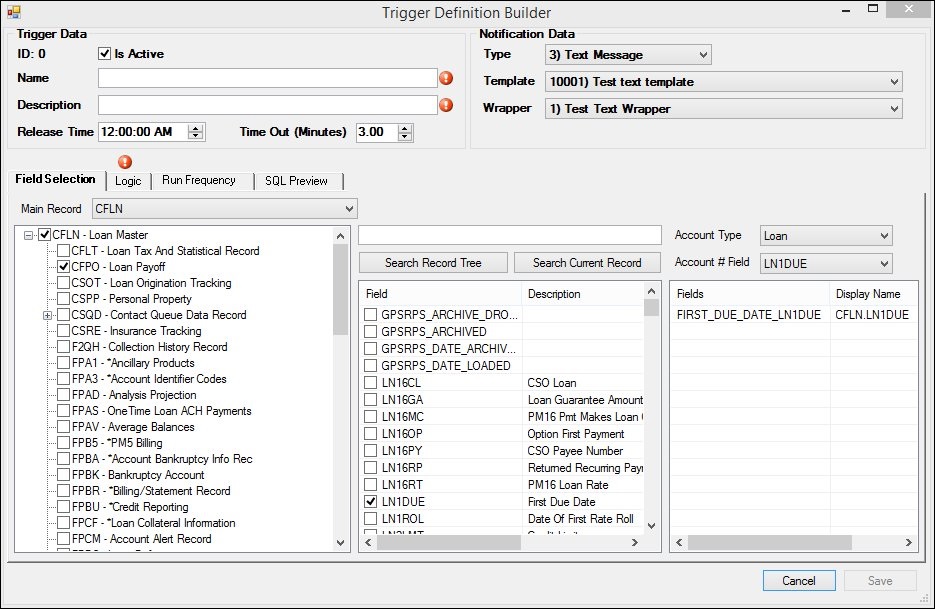
Trigger Definition Builder Dialog with Copied Trigger's Information
5.Enter information for the new trigger, including the Name and Description in the Trigger Data field group. You can also make changes to any of the fields automatically populated by the copied trigger. Make sure to input information in the required fields. The required fields are marked with an ![]() .
.
6.Next, select the Field Selection tab and see if you wanted to change any of the fields used for the trigger. If you want to make changes, select fields, account types, etc. for the new trigger. For example, you could select the CFLN - Loan Master record and the CFPO - Loan Payoff. Then you could select the LN1DUE - First Due Date field, etc.
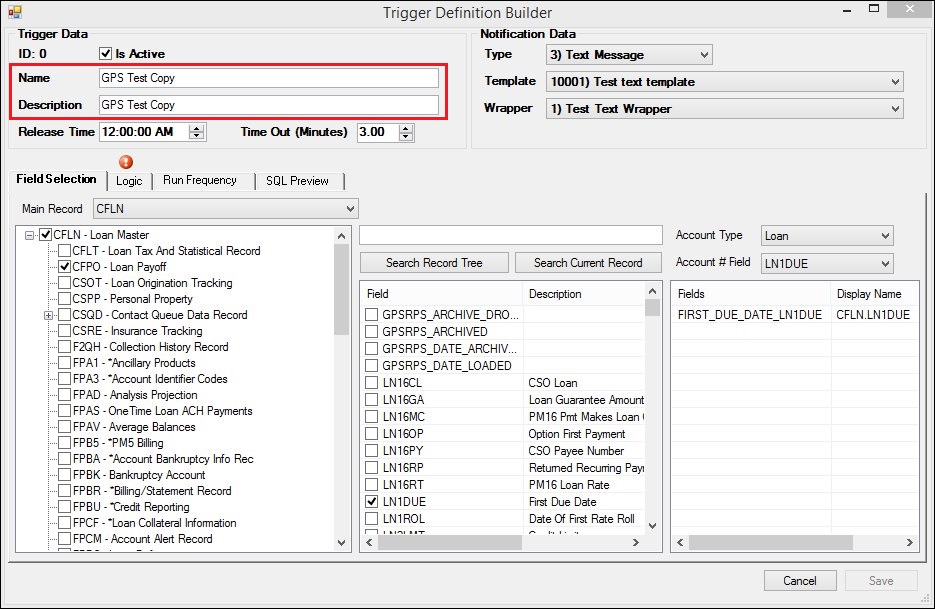
Trigger Definition Builder Dialog: Field Selection Tab
7.Now, select the Logic tab and enter the logic that you would like to use for the new trigger. The system will use the logic entered to determine who to send notifications to and when. For example, you could use the logic to tell the system to send a notification to anyone who is over 30 days late making a payment. The Logic tab also displays a preview of the notification that will be sent. Note: The Logic tab is required. You must enter logic on this tab to create a new trigger.
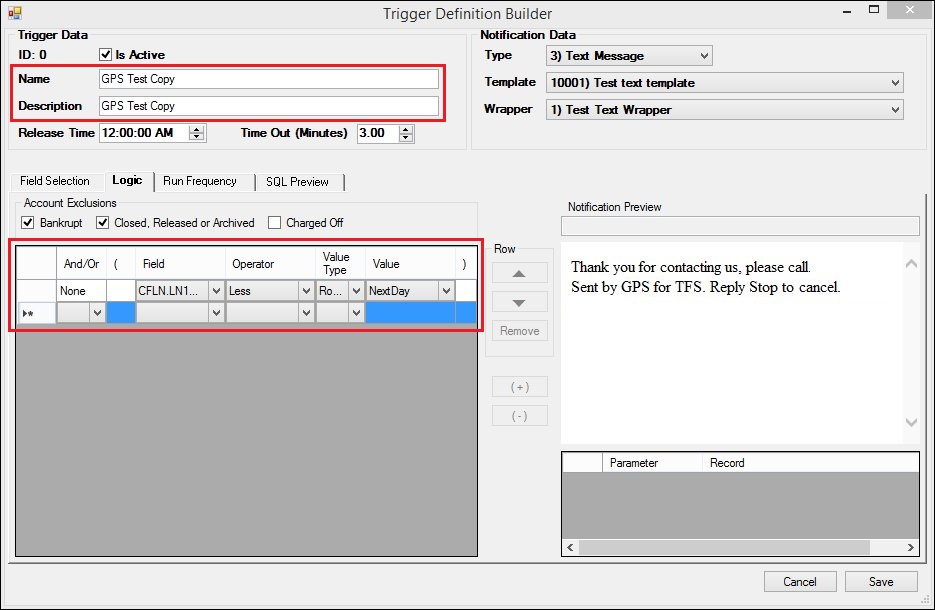
Trigger Definition Builder Dialog: Logic Tab
8.Next, select the Run Frequency tab and see if you want to change when you want notifications sent for the new trigger. For example, the copied trigger may have been set up to send notifications at the end of each month but you may want the new trigger to send notifications every quarter.
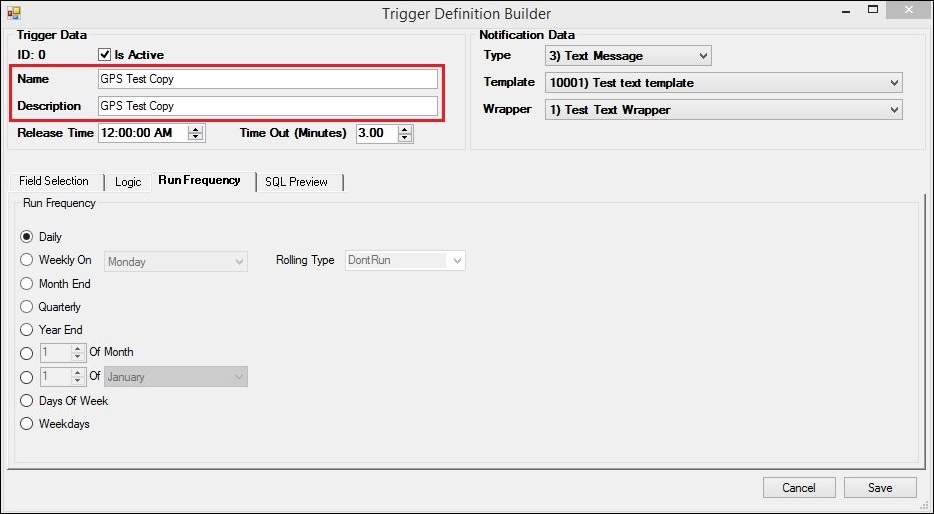
Trigger Definition Builder Dialog: Run Frequency Tab
9.Then, select the SQL Preview tab to view the SQL (Structured Query Language) that you have set up for the trigger. Make sure everything is set up correctly for the new trigger.
10.Once you have entered in all of the data for the new trigger and have verified that it is set up correctly, click <Save> to create the new trigger.
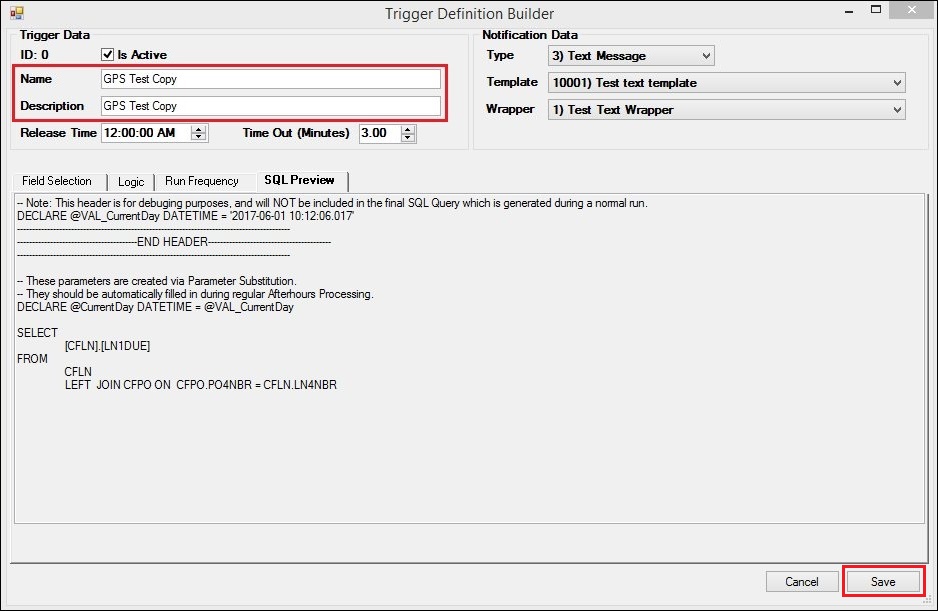
Trigger Definition Builder Dialog: SQL Preview Tab
11.The new trigger is created and appears in the Manage Triggers list view.
12.Click <Save> to save your changes and the new trigger.
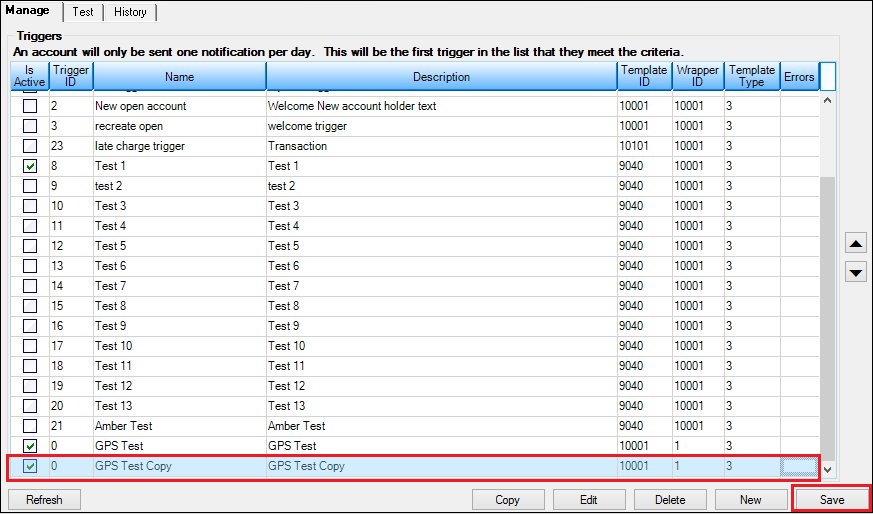
New Trigger Displayed in the Manage Triggers List View
See also: