Navigation: Dealer System > Dealers Screen >
Using the <Custom Data> button on the Dealers screen you can add new custom data or edit existing custom data. This data can be used to inform users if there is a default rate used by the dealer, the industry of the dealer, the ownership type, etc.
To add custom data for a dealer using the Dealers screen:
1.Search for a dealer by entering your desired search parameters and clicking <Search by Name> or <Search by Number>.
2.Select a dealer from the Dealers list view.
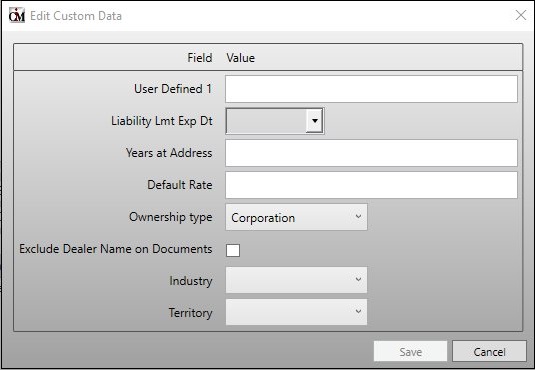
3.Click on the <Custom Data> button to bring up the Edit Custom Data dialog.

Edit Custom Data Dialog
4.Use any of the fields on the dialog to enter custom data for the dealer. Note: You do not have to fill in all of the fields, only the fields that you wish to save information in.
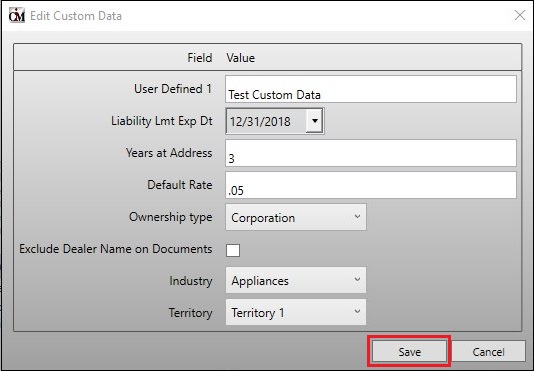
5.Once you have entered all of the custom data that you want to save, click <Save> to save the new custom data and return to the Dealers screen. Note: You must also click <Save> on the Dealers screen to save the custom data changes for the dealer.

Edit Custom Data Dialog with <Save> Button
6.The custom data is now saved for the dealer.
To modify custom data for a dealer using the Dealers screen:
1.Search for a dealer by entering your desired search parameters and clicking <Search by Name> or <Search by Number>.
2.Select a dealer from the Dealers list view.
3.Click on the <Custom Data> button to bring up the Edit Custom Data dialog.

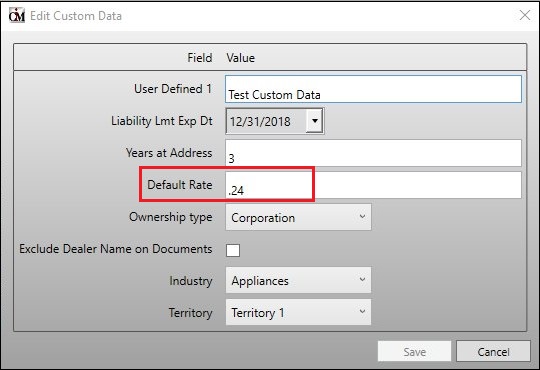
Edit Custom Data Dialog
4.Modify the data in any of the fields on the Edit Custom Data dialog. You can change the information, erase the information, or add new information. In our example, we are changing the information in the Default Rate field.
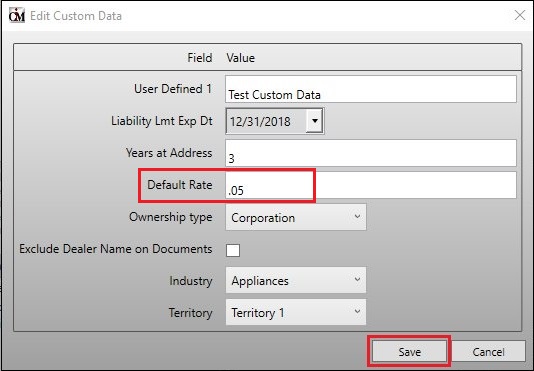
5.Once you have modified all of the custom data that you want to modify, click <Save> to save the new custom data and return to the Dealers screen. Note: You must also click <Save> on the Dealers screen to save the custom data changes for the dealer.

Edit Custom Data Dialog with <Save> Button
6.The custom data changes have been saved and are now saved for the dealer.
See also: