Dealers Screen |
  

|
Navigation: Dealer Setup > Dealer Setup Screens >
Dealers Screen |
|
Use this screen to view, create, and edit information about dealers at your institution. This screen contains several tabs used to organize and separate dealer information. Depending on how your institution's administrator has set up the Dealer system on the Dealer Setup > Options screen (as well as the security clearance of the current user), some tabs described in this help manual may not be visible.
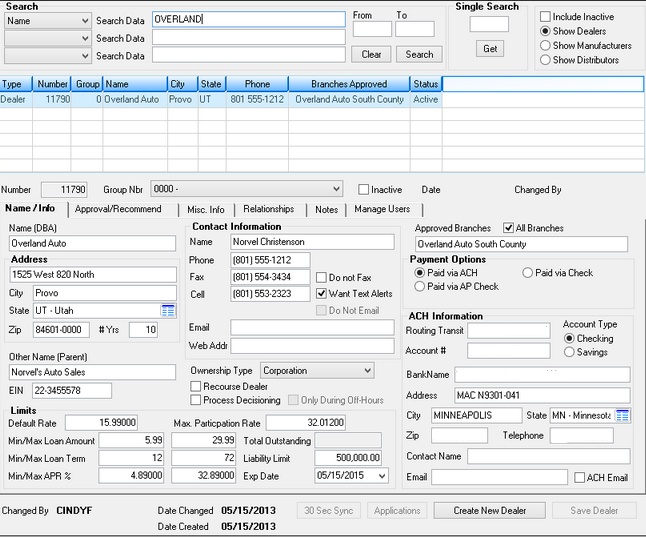
Dealer Setup > Dealers Screen
The list view at the top of this screen displays all dealers currently set up at your institution. See Dealer list view/search/info fields for more information about searching this list and the information it displays. Select a dealer in the list to populate the fields on this screen with that dealer's information. The fields will then be available for editing.
Click <Create New Dealer> and enter information in the fields on this screen to create a new dealer record. An option is available that will automatically enter the Number for each dealer in the order they are created. This option, Use Auto Numbering for Dealer System, is found on the Options screen.
The fields and tabs on this screen are as follows:
Dealer list view/search/info fields
|
Record Identification: The fields on this screen are stored in the GTDL record (Dealer Record). You can run reports for this record through GOLDMiner or GOLDWriter. See GTDL in the Mnemonic Dictionary for a list of all available fields in this record. Also see field descriptions in this help manual for mnemonics to include in reports. |
|---|
In order to use this screen, your institution must:
•Subscribe to it on the Security > Subscribe To Mini-Applications screen.
•Set up employees and/or profiles with either Inquire (read-only) or Maintain (edit) security for it on the CIM GOLD tab of the Security > Setup screen.
•Set up the desired field level security in the GTDL record on the Field Level Security screen/tab. |