Form/Font Configuration |
  

|
Navigation: Teller System > CIM GOLDTeller Overview > CIM GOLDTeller Screen Details > Functions > Administrator Options >
Form/Font Configuration |
|
![]() Functions menu > Administrator Options > Form/Font Configuration
Functions menu > Administrator Options > Form/Font Configuration
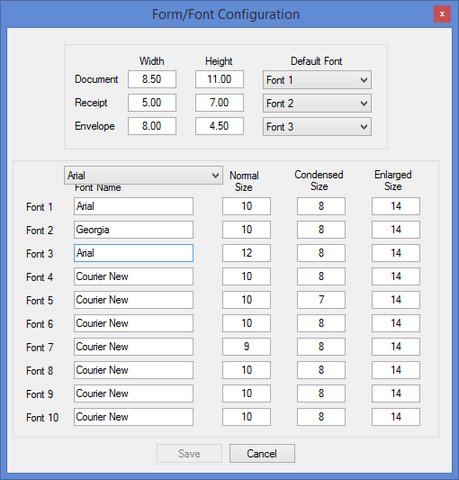
This function allows you to set up the dimensions your institution uses to print documents, receipts, and envelopes. You may need special printers to print each type of item. For example, receipt printers usually require a smaller width. Use this screen to also set up the types of fonts you want to use when printing those items.
See the following example of this screen:
Your GOLDPoint Systems account manager may need to help you with how to set up this screen. This help topic aims to explain it as best as possible.
Before setting up the forms and fonts, you should make sure the printers are set up correctly on the Functions > Administrator Options > System Configuration screen > Printer Defaults tab.
1.Set up the dimensions of document to be printed from GOLDTeller. Documents include items such as the Balance Sheet, Teller Totals, and Currency Transaction Report. Usually, the Width and Height for documents is the same as letter paper: 8.50 inches for width and 11.00 inches for height, unless you print on legal-sized paper.
2.Set up the dimensions for the receipts to be printed from GOLDTeller. Some institutions use a special receipt printer. The box that the receipt printer roll comes in will have the dimensions.
3.Set up the dimensions for envelopes to be printed from GOLDTeller. The box the envelopes come in displays the dimensions of the envelopes. Enter those dimensions in these fields.
4.Next, you should set up the different fonts you want to use in the Font 1, Font 2, Font 3, etc. fields. If you need help with a font name you want to use, you can view all possible fonts from the drop-down list. If you select a font from this list and click <Save>, that font is saved to the Font 1 field.
You will need to manually type the font's name in each of the fields. In the example above, only three fonts are used.
5.Select which font you want to use for the documents, receipts, and envelopes in the Default Font fields. These fields correspond with the Font fields below (see step 4 above). For example, in the screen shot above, Documents will use Font 1, which is Arial.
Now you need to set up the different type of forms on the Print Form Design screen.
Note: In order to access this screen, you need to be set up with the Form/Font Configuration security option on the System tab of the Security > Setup screen. See GOLDTeller Security Features for more information.