Navigation: Loans > Loan Screens > Loan Assumption Screen >
Once all necessary information has been entered in the other tabs on this screen, use this screen to test and process the loan assumption by the buyer.
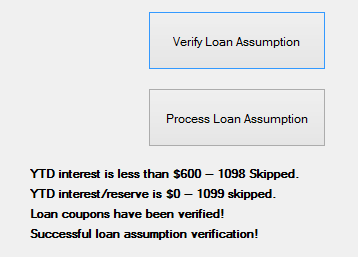
Click <Verify Loan Assumption> to verify (test that) all information has been entered correctly. The system displays the results that will occur if the assumption is processed, as shown below:

Loans > Loan Assumption Screen, Process Assumption Tab
This message will display any error present on the assumption record. Use this information to finalize the assumption record before the assumption is processed.
Click <Process Loan Assumption> to begin the assumption process. There are seven steps involved in processing a loan assumption. As each step is processed, a status message will be displayed. Some steps require several transactions to be generated and will require additional time to complete. The steps of a loan assumption process are:
1.All CIF information is processed. All CIF information associated with the loan for the seller is removed. The CIF information will still remain after the assumption and will not be dropped until requested or until year-end drops. New CIF records will be created for the buyer, or, if the CIF information is on file, new associations will be created to point to the assumed loan.
2/3. The 1098 and/or 1099-INT records are created (if requested in the Seller Name & Address Information field group). This information is sent to IRS GOLD for IRS reporting purposes. Your institution is responsible for printing and mailing these IRS notices.
| 4. | A Collection history item is created (if the Create Collection History Item field is marked). If the account has never been sent to collections, this step will be skipped. |
| 5. | The system processes all assumption information. This step saves Year-to-Date information for future reference. |
| 6. | The system orders new loan coupons for the buyer (if the Order Coupons field is marked). |
| 7. | The system processes all loan information, and transfers the loan to the buyer. This step clears all Year-to-Date fields and late information fields for the buyer. |
If a loan assumption is processed successfully, the Assumption Completed field will display "Yes." If the loan assumption did not process successfully, the system will display an error message. The error will need to be corrected before the loan can be processed.
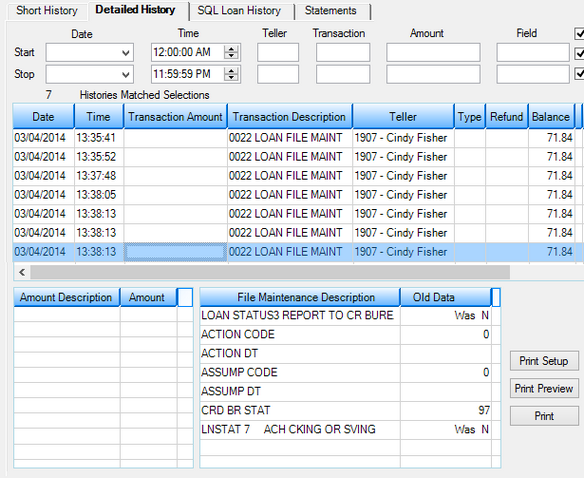
All transactions performed during this process will generate a history item in the loan record, as shown below:

Loans > History Screen, Detailed History Tab