Navigation: Loans > Loan Screens > Check Printing Screen Group > Checks Screen >
|
Note: Your institution must be set up in the system to fund customers' debit cards directly. Contact your GOLDPoint Systems account manager for more information about the setup requirements for this function. Adjustments will need to be made in CIM GOLD, as well as to origination APIs, core services (host), and back-end services to connect all components together. Your institution will also need a contract with a third party debit card vendor.
The <Send Card> button in step 4 (and therefore the ability to use this feature) will only be available on this screen if Institution Option SENC is enabled.
A System Setup screen is available to indicate General Ledger accounts to credit and debit for new loans funded via debit card. See Funding Portal G/L Setup for more information. |
|---|
Follow the steps below to use the Checks screen to fund a loan by distributing money directly to a customer's debit card (rather than by sending a check).
1.Use the Check Retrieve Parameters field group to indicate criteria (make sure the Check Type is set to "Funding") and populate the main list on the Checks screen.
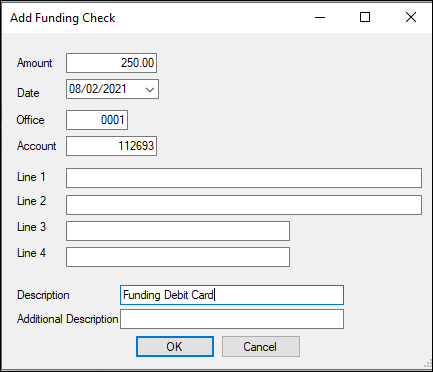
2.Select the desired payee and account number in the list and click the <Add Check> button beneath the list. This opens the Add Funding Check dialog, as shown below:

3.Use the fields on this dialog to information about the card distribution Amount, Date, Office/Account numbers, and any additional necessary information (Line 1-4, Description/Additional Description). Click <OK> to return to the main Checks screen.
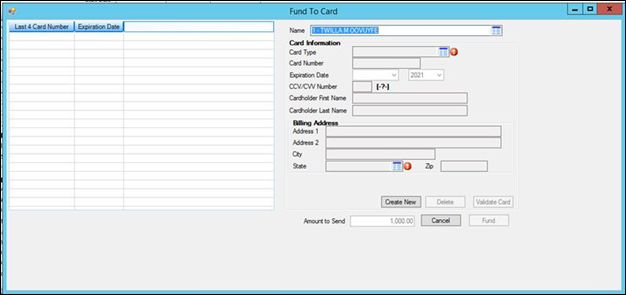
4.Locate the funding transaction created in steps 1-3 in the main list on the Checks screen. Select the funding transaction and click the <Send Card> button beneath the list. This will open the Fund to Card dialog, as shown below:

5.Use this dialog to indicate information (card type, number, expiration date, cardholder name, billing address) about the debit card that will receive the funding. A new debit card can be set up by clicking <Create New>, or a previously created card can be selected using the list on the left side of the dialog.
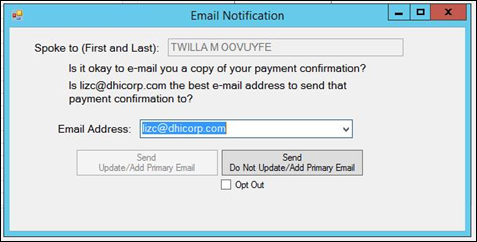
6.Click <Fund>. A dialog will appear asking the user to confirm the funding and card information. Click <Yes> to initiate the funds distribution and open the Email Notification dialog, as shown below:

7.Use this dialog to manage the customer's payment confirmation email regarding this transaction. Each option below will cause a Comment to be created on the account:
•If the customer does not want an email copy, mark the Opt Out checkbox.
•If the customer wants a copy and the Email Address is (or should become) their primary email, click <Send Upate/Add Primary Email>. This will send the confirmation and confirm or update the Primary Email on the account.
•If the customer wants a copy but the Email Address is not (or shouldn't become) their primary email, click <Send Do Not Update/Add Primary Email>. The confirmation will be sent, but the indicated email address will not be saved in the system.