Navigation: Loans > Loan Screens > Marketing and Collections Screen > CIF tab >
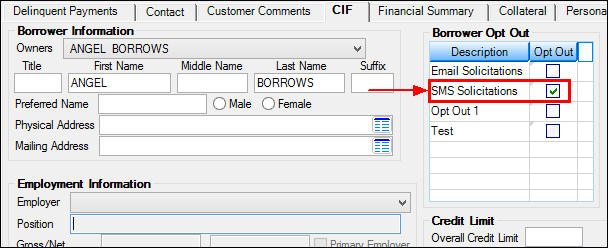
The Borrower Opt Out list view on the CIF tab of the Marketing and Collections screen is used to view which options the borrower has opted out of in regards to marketing or other contact. For example, if the customer does not want marketing text messages, the Opt Out box for SMS Solicitations is checkmarked, as shown below:

Opt-out fields are transferred over when loans are boarded from GOLDTrak PC or eGOLDTrak. For example, the Email Solicitations and SMS Solicitations options are transferred from the Opt Out Email Solicit (OPT_OUT_EMAIL_SOLICT) and Opt Out SMS Solicit (OPT_OUT_SMS_SOLICT) fields in GOLDTrak PC, if your institution uses those fields. You can change that information here, however.
Setup of Opt Out Options
Opt-out options are set up two ways:
•Using the Loans > System Setup Screens > Opt Out screen. These options are for your employees information. Examples of these type of opt-out options are phone calls, pre-approvals, telemarketing, etc. These do not affect the system in any way, except to notify the employee that the customer does not want those types of contact.
•The Opt Out SMS Solicitations (I4MKTX) and Opt Out Email Solicitation (I4MKEM) options appear in this table only if institution options SOOE (Show Opt Out Solicitation Email) and SOOT (Show Opt Out Solicitation SMS) are set up for your institution. Once customers have opted out of those types of emails or text messages, the system will not allow you to send email or text messages to them with those template categories. Template categories are set up using the Template Category field on the Notification > Template Detail screen. If you attempt to send an email or text to a person who has opted out of marketing emails or texts, the system will return an error and not send the message.
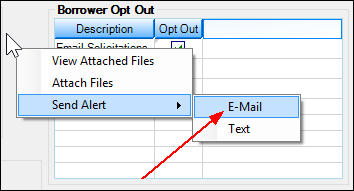
For example, a customer has opted out of marketing emails. In the following screen example, we right-clicked on the CIF tab of the Marketing and Collections screen and selected Send Alert > Email from the pop-up box, as shown below:

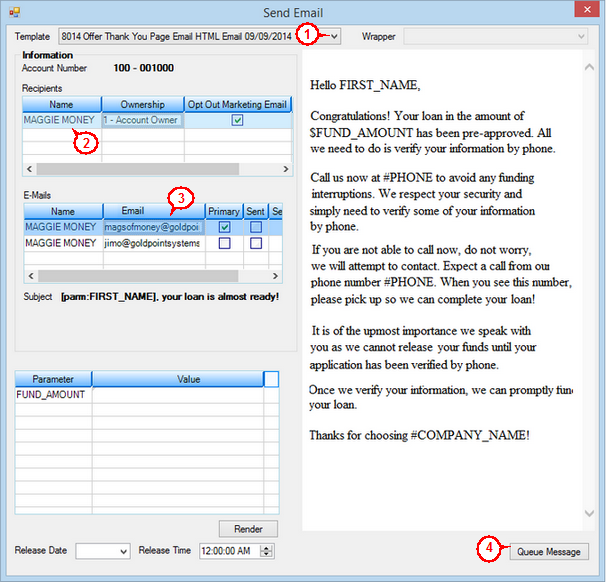
The Send Email screen is displayed, as shown below.

1.Select the template to use for the email in the Template drop-down list.
2.Select the name of the person to receive the email in the Recipients table.
3.Select the email address of the person in the E-mails table.
4.Click <Queue Message>.
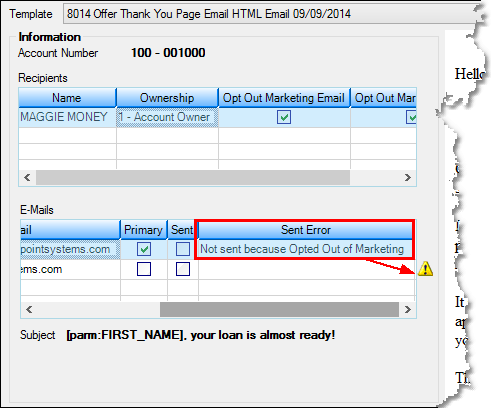
5.Because the Template selected in step 1 was a marketing template, the system returns an error message in the E-mails table saying the email was not sent because the customer has opted out of marketing emails, as shown below.

Use the fields in the Account Address / Statement Information field group to indicate further restrictions on contacting customers.