Creating a drop-list field |
  

|
Navigation: Teller System > CIM GOLDTeller Overview > CIM GOLDTeller Screen Details > Functions > Administrator Options > Transaction Design >
Creating a drop-list field |
|
Creating a drop-list field is a multi-step process.
| 1. | You must create the fields in the System Field Dictionary. See System Field Dictionary for more information. |
| 2. | You must create the drop-list using the View/Modify Droplists function. See View/Modify Droplists for more information. |
| 3. | The final step is to assign a field to that drop-list. See the following steps. |
Assigning a field to a drop-list
| 1. | Access the Functions > Administrator Options > Transaction Design screen. |
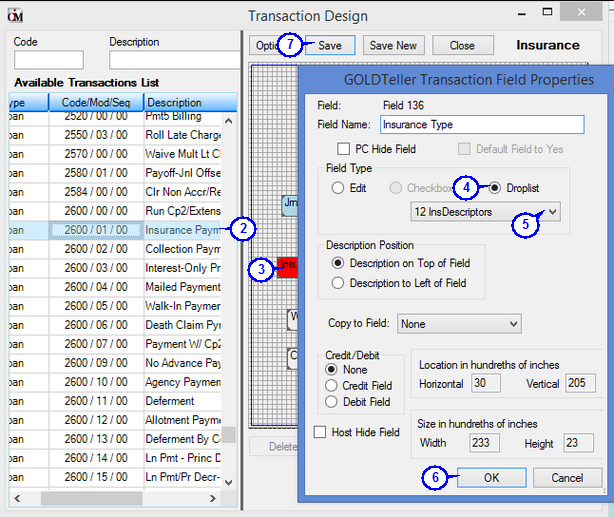
| 2. | Scroll to find the transaction with the field you want to assign a drop-list. When you've found it, click on it. It will appear in the transaction design area to the right. |
| 3. | Right-click the field you want to assign a drop-list. In the example below, we are assigning an insurance type drop-list to a field. The GOLDTeller Transaction Field Properties box is displayed. |
| 4. | Select the Droplist radio button in the Field Type. |
| 5. | Select the droplist you want for this field. (This should have been already created using steps 1 and 2 in the multi-step process described above.) |
| 6. | Click <OK>. |
| 7. | Click <Save> on the Transaction Design screen. |
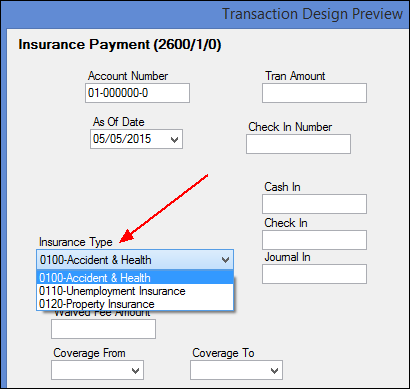
| 8. | Click <Preview> to view your changes. |
Example of the drop-list: