Navigation: Teller System > CIM GOLDTeller Overview > CIM GOLDTeller Screen Details > Functions > Administrator Options >
![]() Functions menu > Administrator Options > View/Modify Droplists
Functions menu > Administrator Options > View/Modify Droplists
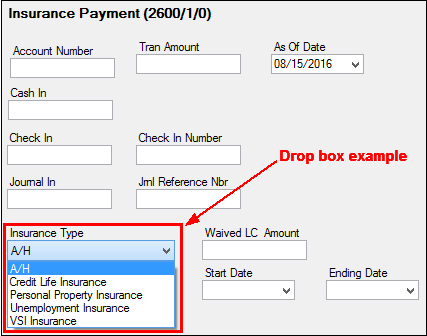
Use a drop list to provide a quick list of available options for a specific field within a transaction. The drop list helps to assure accuracy and controls what content may be entered into that field. A drop list can be added to most fields found on transactions, as shown below:

Creating a drop-list field is a multi-step process.
| 1. | You must create the fields in the System Field Dictionary. See System Field Dictionary for more information. |
| 2. | You must create the drop-list using the View/Modify Droplists function. See the steps below for more information. |
| 3. | The final step is to assign a field to that drop-list. See Creating a drop-list field under the Transaction Design section. |
1. |
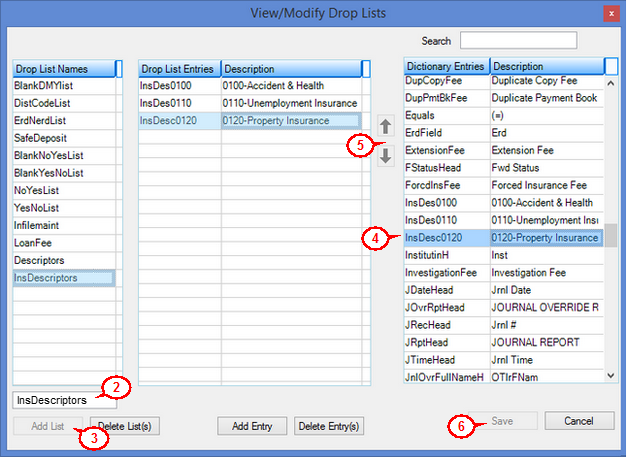
Select Functions > Administrator Options > View/Modify Droplists. |
2. |
Type the name of the droplist you want to create in the field above the |
3. |
Click |
4. |
In the far right list, select a field you want added to the drop list and click
Note: You should have already created the fields using the System Field Dictionary. |
5. |
Use the up/down arrows in the middle to arrange the desired order of the fields within the drop list. |
6. |
Once all desired fields have been placed in the middle list, click |

You aren't done yet. You now need to finish the last task. See Creating a drop-list field under the Transaction Design section. |