Navigation: GOLD Services > GOLD Services Screens > Check Reconciliation Screen Group > Check Detail Screen > Search fields > Buttons/Dialogs >
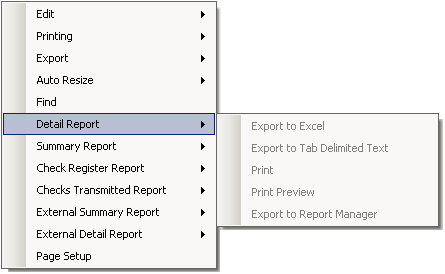
Reports for the search results displayed in the Check Detail list view are available by right-clicking anywhere in the list and selecting the desired report, or clicking on the <Reports> button. Each report can be printed either directly from CIM GOLD by selecting "Print" or "Print Preview" from the report menu, or exported to a tab-delimited text file, Report Manager, or Microsoft® Excel®.
Reports printed directly from CIM GOLD are formatted to fit all the data on one page in either portrait or landscape orientation, depending on the report. When reports are exported directly to Excel, each data field will be found in its own row/column to allow for quick data comparison.
|
Note: The report options will be grayed out until you perform a search on the Check Detail screen. |
|---|
Each report includes the following options:
•Selecting "Print" or "Print Preview" from the report menu allows you to print the report directly to a printer of your choosing. When you select this method, the reports will print similarly to the following CIM-GOLD generated format.
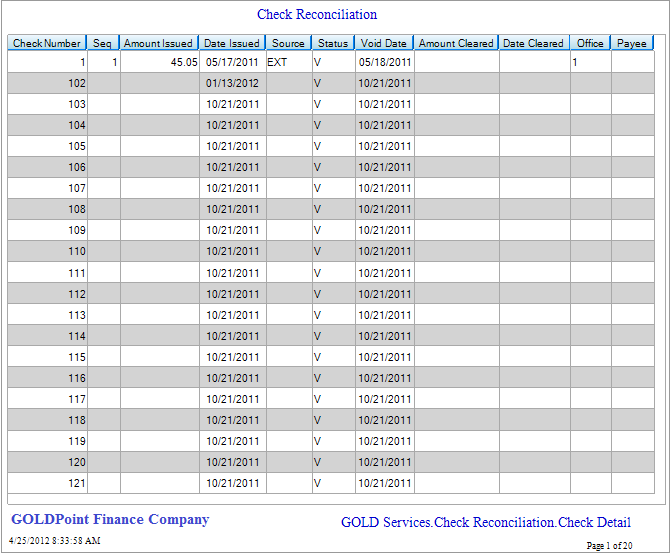
Example of Check Reconciliation Report as it appears in the CIM-GOLD generated format
•Export the report to a tab-delimited text file. If you select this option, a message will appear asking you where you want to save the report. Once you have saved the report, you can open it in any word processor or even into Microsoft's free program, Notepad®. See the following example of a saved text report opened in Notepad.
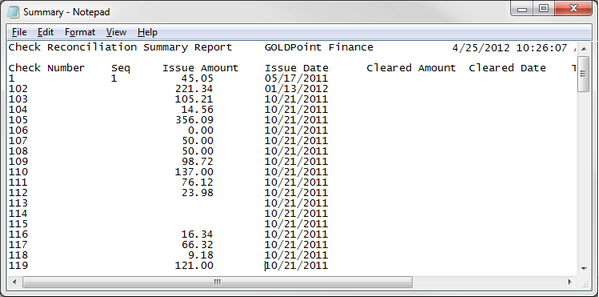
Example of Check Reconciliation Report exported to Notepad
•Report Manager is GOLDPoint System's robust program for viewing text reports. When you select this option, CIM GOLD will first ask you to save the report. Once you select a place to save the report and click <Save>, Report Manager will automatically open with the report displayed. For more information on the features and functions of Report Manager, see the Report Manager User's Guide on DocsOnWeb. The following is an example of a report as it appears in Report Manager.
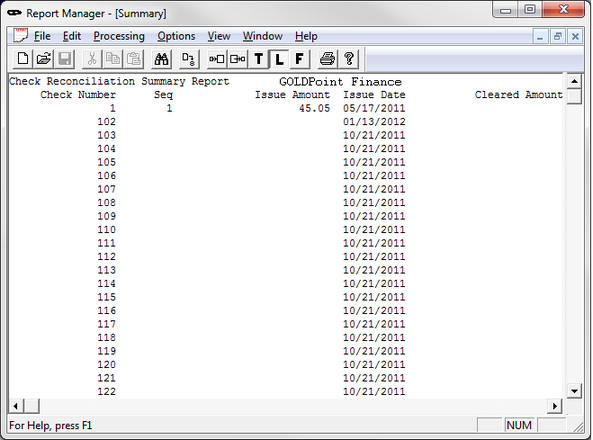
Example of Check Reconciliation as exported to Report Manager
•Excel® is a familiar data-processing program developed by Microsoft®. If you select this option, a message will appear asking you to save the report. Once you select a place to save the report and click <Save>, Excel will automatically open with the report displayed. From there you can use Excel's features to manipulate and utilize the report however you need. The following is an example of a report as it appears once it has been exported to Excel.
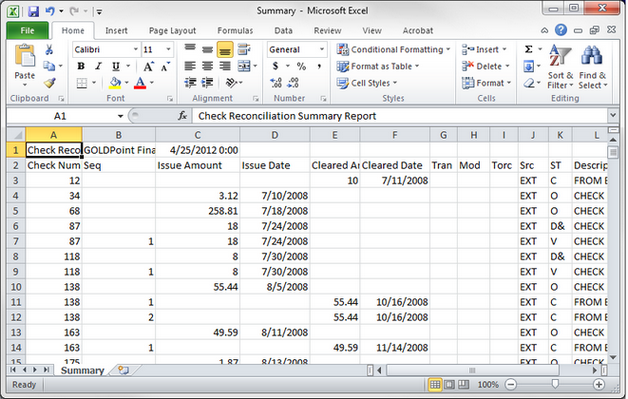
Example of Check Reconciliation Report as exported to Excel
Reports printed directly from CIM GOLD are formatted to fit all the columns of data on one page in either portrait or landscape orientation, depending on the size of the report table. When reports are exported directly to Excel, each data field will be found in its own row/column to allow for quick data comparison.
The following sections describe these reports and provide an example of each report. You can also set up Check Reconciliation records in GOLDWriter, as explained below.
If a third-party vendor is used for reconciliation, a Check Reconciliation Report will be generated in the afterhours the night the transmission is sent to the third party. It shows information pulled from detailed information of the Check Reconciliation record. Please refer to the Check Detail main topic for field descriptions for information found on this report.
If a check has cleared before voiding, the system will write out a new Check Reconciliation record with the same check number but different sequence number. The original sequence number will be updated with a "D" status.
These checks will be resubmitted to a third-party processor with the new void status. The system treats the duplicate status check and the void status check as one check, and will total the check only once as a voided check. If you select checks by the Date Issued/Voided, those checks voided but not issued during the date range will not be added to the issued totals. Voided or cross-referenced checks that were issued but not voided during the date range will not be added into the void totals. Those items will be marked with a plus (+) next to the void or crossreference status.
Checks created in the Accounts Payable do not instantly appear in Check Recon; they are entered during the afterhours process. When the information is moved to Check Recon, a report is created. The option to use Check Recon for Accounts Payable checks is found in GOLDVision > Financial Options System (Application 18) > Accounts Payable System Options screen (function 3/4), Option 1 tab. See section 1.2, Options Screen, in the Accounts Payable manual for more information about these options. |
The Check Reconciliation Summary Report displays summary information of check records from a designated range you set up using the search fields on the Check Detail screen. This report is useful in tracking checks that are either cleared or outstanding. To print the summary report, click <Reports>, and then select "Summary Report."
The information for this report is pulled from fields on the Check Detail screen. |
Similar to the Check Reconciliation Summary Report (see above), the Check Register Report includes the checks' voided dates, originating offices, payee names, and account numbers. It will also subtotal by originating office when check number ranges are used for each office.
This report is useful in tracking outstanding, cleared, and voided checks by branch. Key fields are the originating branch, voided date, account number, and payee fields. To create a subtotal for every branch, type a number range in the Originating Office fields when performing a search. The system will put a page break with subtotals anytime the check number length or the branch number changes.
Note that the Account Number column will either print the G/L account number or the first deposit/loan account number on the report. If a check has both a deposit/loan account and a G/L account, the G/L account number will be printed. |
This report shows the transmitted date and time if your institution transmits check records to a third party. |
The External Summary Report creates a summary of daily external check totals for each day you select in a date range. A recap report prints after the Summary Report. The recap report can help determine if the summary report is in balance using the previous outstanding balance. A diagnostic report also prints after the summary report. The diagnostic report displays stopped items, voided items, and items with errors. The diagnostic report displays information as of the run date. Note: The date range can be spread only 185 days.
To print a summary report for an external account, complete the following steps using the GOLD Services > Check Reconciliation > Check Detail screen:
1.Enter the previous outstanding balance in the Issued Amount From field, an account number in the Account Number From field, and a date range in the Date Issued From and Date Issued To fields on the Check Detail screen.
2.Click <Search>. All matching check records will appear in the list view in the middle of the screen.
3.Click <Reports>, and then select "External Summary Report" from the Reports pop-up menu.
4.Select how you want the report printed (print directly to a printer, a tab-delimited file, export to Excel, or export to Report Manager, as explained above).
5.The External Summary Report will print or export to whichever selection you chose. |
The External Detail Report displays detail information of all checks issued and cleared during a specified date range. The maximum number of days that can be used in the date range is 75. This report is useful in showing the quantity of checks issued, paid, outstanding, stale-outstanding, stopped, and voided within a specific period of time.
To create an External Detail Report, complete the following steps using the Check Detail screen:
1.Enter a date range in the Date Issued From and Date Issued To fields.
2.Enter an account number in the Account Number From field.
3.Click <Search>. All matching check records will appear in the list view in the middle of the screen.
4.Click <Reports>, and then select "External Detail Report" from the Reports pop-up menu.
5.Select how you want the report printed (print directly to a printer, a tab-delimited file, export to Excel, or export to Report Manager, as explained above).
6.The External Detail Report will print or export to whichever selection you chose. See the following example of this report. |
|
Note: The following codes may appear at the bottom of reports depending on the dates showing in the Issued Date and Voided Date fields. They are useful in deciphering the totals at the bottom of the detail, summary, and register reports.
|
|---|
GOLDWriter
GOLDPoint Systems' report-building program, GOLDWriter, can also produce reports using Check Reconciliation fields and their matching mnemonics. The Check Reconciliation record is known as FPCR in GOLDWriter. For more information on GOLDWriter, see the GOLDWriter User's Guide on DocsOnWeb.
The following mnemonics are available:
Mnemonic |
Description |
|---|---|
CRCHK# |
Check Number |
CRSEQ2 |
Check Sequence |
CRDSCR |
Description |
CRCKOT |
Issued Amount |
CRDTCK |
Issued Date |
CRCKIN |
Cleared Amount |
CRDTPT |
Cleared Date |
CRTCOD |
Transaction Code |
CRTMOD |
Modifier Code |
CRBORG |
Origination Office |
CRTORC |
Transaction Origination Code |
CRMANU |
Check Entered Manually? |
CRACTO01-14 |
Office Number |
CRACTA01-14 |
Account Number |
CRCKDG01-14 |
Check Digit |
CRTPC1 |
Check Status |
CRSRCE |
Source of Check |
CRTRNB |
Reconciliation Trace Number |
CRRTNM |
Routing/Transit Number |
CRBNK# |
Bank Account |
CRDTLA |
Last Updated On |
CREMPX |
By Employee |
CRREF |
Cross-Reference |
Also see