Navigation: Queues > Queue Screens > Contact Queues Screen Group > Definition Screen > Follow-up Queues from Comments >
This help topic describes the general steps of setting up a pre-designed script for employees to use when contacting customers through a follow-up queue on the Contact Queues screen. These steps will give you a general overview, but you can change the details of the steps according to your institution's needs.
First, review the steps outlined in the Follow-up Queues from Comments topic. These steps will be similar to those, but we will also explain how to create a Design screen and tie that to a follow-up queue.
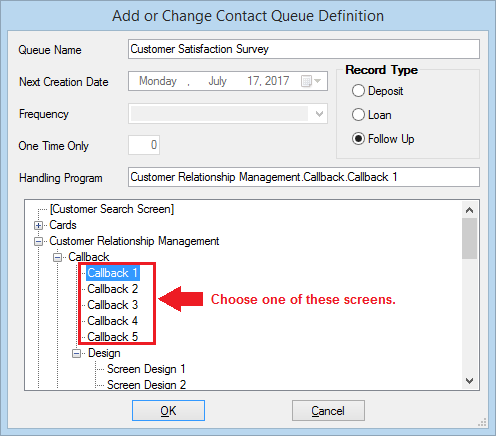
1.Create a queue using the steps outlined in step 1 of the Follow-up Queues from Comments topic. However, instead of choosing the Comments screen, choose one of the five available Callback screens, as shown below:

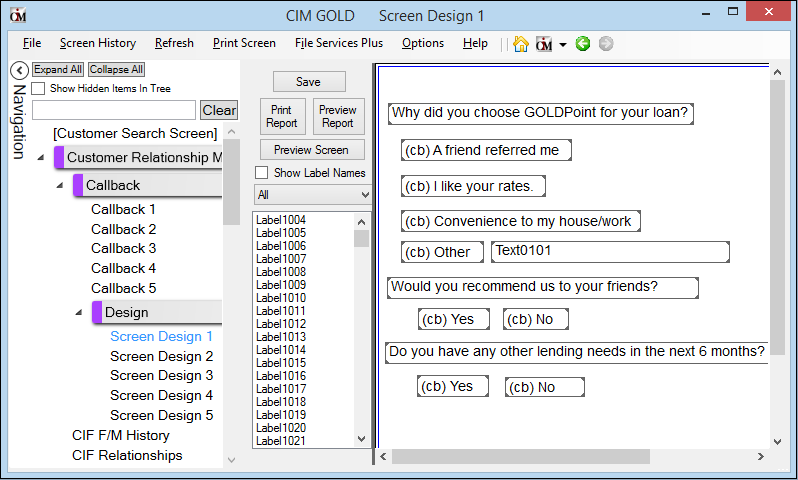
2.After clicking <OK>, access the Customer Relationship Management > Design > Screen Design 1. For this example we are using Design 1 screen, but you can use any of the five Design screens. They correspond with the five Callback screens. So in other words, if you selected Callback 5 in step 1 above, you would select Screen Design 5 in this step.
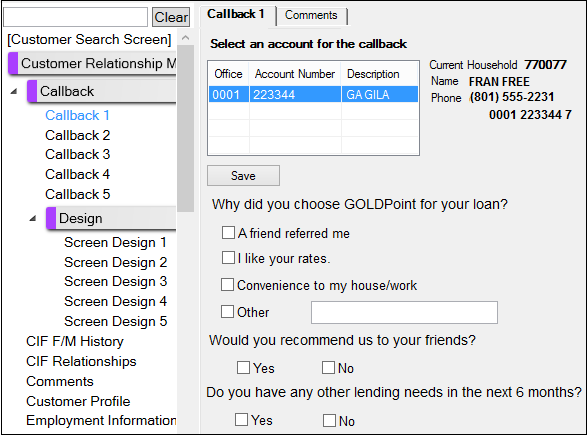
3.Create the design for your callback screen using the Screen Design, then click <Save>. See the help for Screen Design for more information on how to do this. See the example below of a finished Screen Design, followed by how that design looks on a Callback screen.

Customer Relationship Management > Design > Screen Design 1

Callback 1 Screen based on Design Screen 1 above.
4.Complete the steps outlined in the second part of the Follow-up Queues from Comments help.
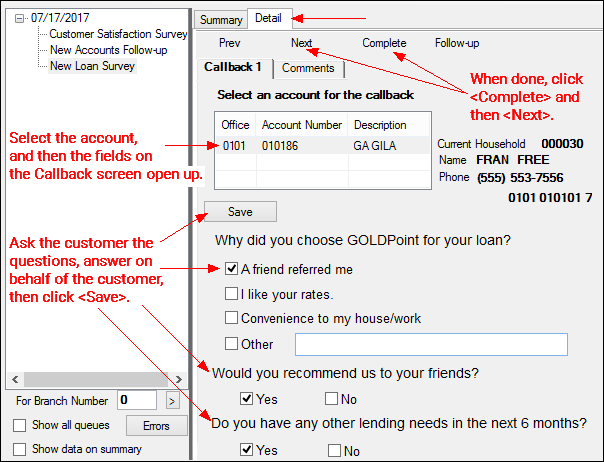
5.Now when employees select the Contact Queues screen for that follow-up queue, the Callback screen will be displayed on the Detail tab. Employees can call customers and ask them the questions on the Callback screen, then mark the account complete when finished, as shown below:

Queues > Contact Queues > Contact Queues Screen with Callback Screen selected for the Detail tab.