Navigation: Queue Screens > Contact Queues Screen Group > Contact Queues Screen >
Generally, Mail Merge letters only have to be created once. After that, the merge information can simply be assigned to merge letters, as explained in the following instructions.
|
Note: These instructions are for Word 2013. The steps may be slightly different if using earlier or more recent versions of Word. |
|---|
1. |
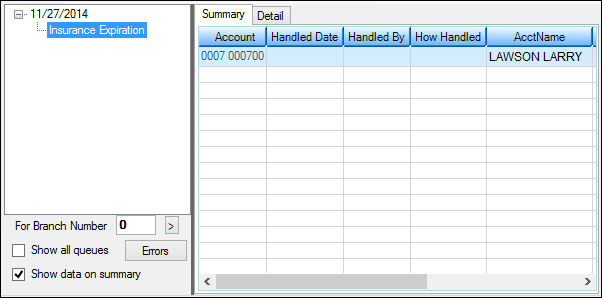
Access the Queues > Contact Queues > Contact Queues screen in CIM GOLD. Use the fields on the screen to display the desired queues in the tree view. Select the desired account(s) in the Summary tab list view.
 |
2. |
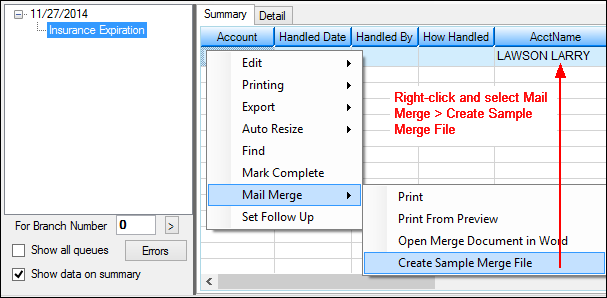
Right-click the selected account(s) and select "Create Sample Merge File" from the pop-up menu, as shown below:
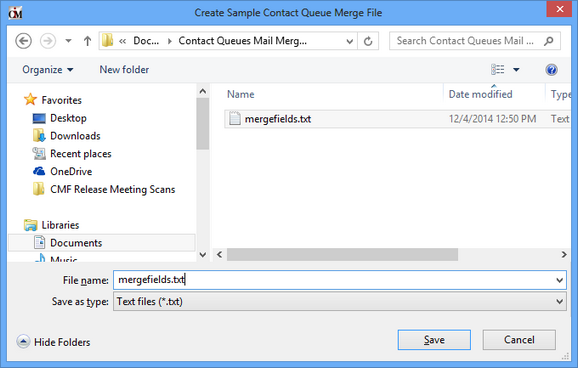
The Create Sample Contact Queue Merge File dialog will appear as shown below:
 |
3. |
Using this dialog, select the location to save the merge fields. This file, when created, does not contain personal customer information. It only creates the merge fields needed in creating a merge document in Word. |
4. |
Open Microsoft® Word® and create the letter. Insert the merge fields where appropriate, as described in the following steps. |
5. |
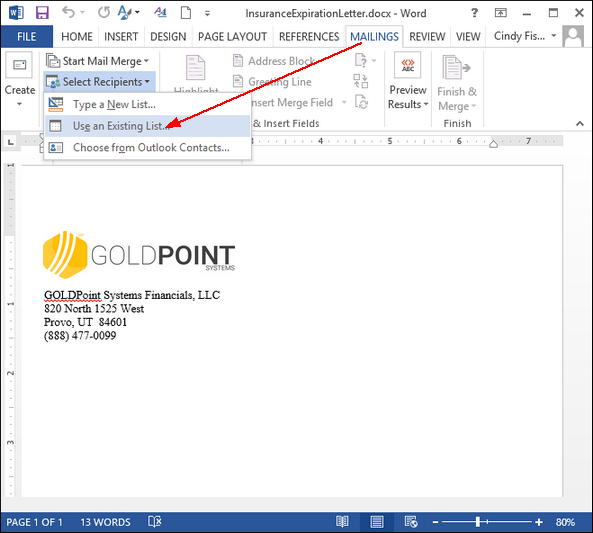
Click the Mailings tab, and then click Select Recipients. Select "Use an Existing List" from the list of options (see below).
 |
6. |
The Select Data Source dialog box appears. Find the merge fields data file saved in step 4 above. Open the file.
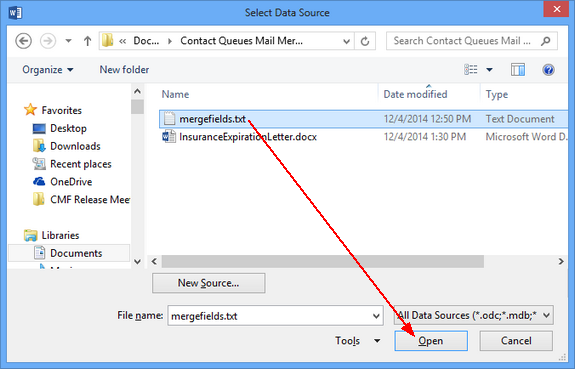
Merge fields can now be inserted into the letter that will match up with CIM GOLD information. The following steps will explain how to insert a merge field. For a list of all possible merge fields and how they match up to fields in CIM GOLD, see Merge Fields in Queues. |
7. |
Place your cursor where the first merge field will go. |
8. |
On the Mailings tab, click Insert Merge Fields, and from the list that appears, select the merge field to insert.
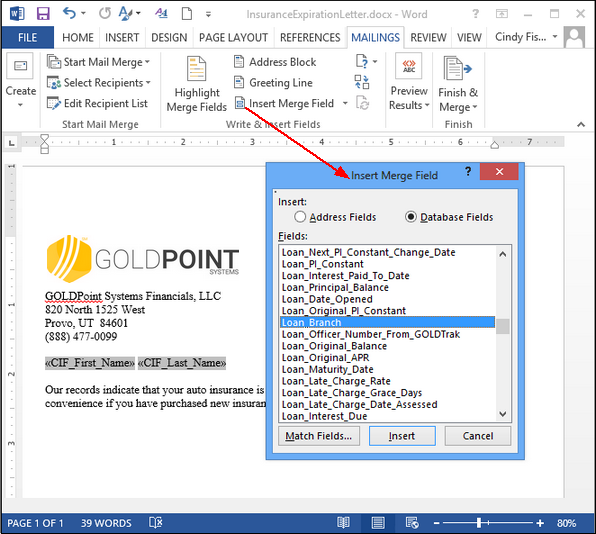 |
9. |
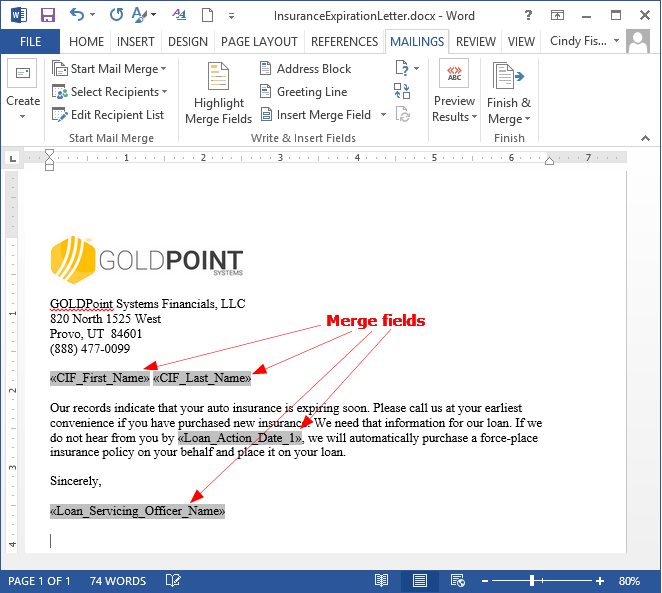
The merge field now appears where the cursor was. Continue adding merge fields throughout the document where information from CIM GOLD will be inserted, as seen in the following example (merge fields have a gray background):
 |
10. |
Save the Word document. It is recommended you save it with the same name as the contact queue (e.g., Repossession Letter, Insurance Expiration, etc.). |
11. |
Close the Word file. Merge letters cannot be printed in CIM GOLD if the Word document is open. Now the letter can be combined with actual borrowers' information using CIM GOLD. |
12. |
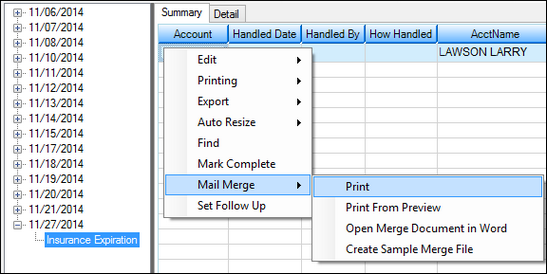
From the Contact Queues screen, right-click on the list of contacts displayed on the Summary tab (from step 1 above), as shown in the following example:
 |
13. |
Select either Mail Merge > Print or Print From Preview. The Open dialog box is displayed, where the saved letter can be found (as shown below).
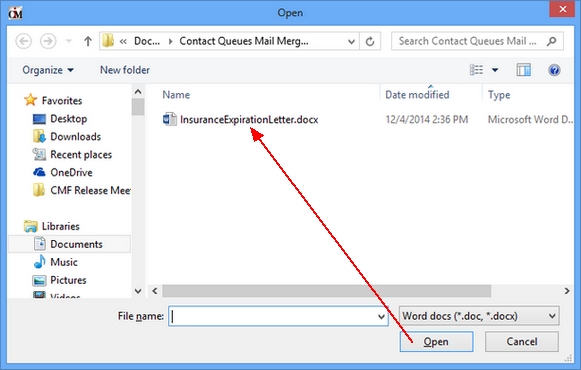
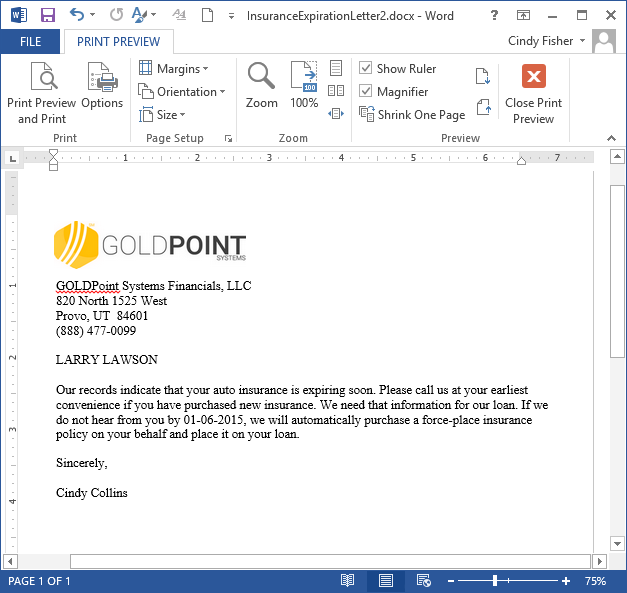
If selecting Print Preview, the letter appears in a Word preview screen like the one shown below. From this screen, all the letters selected in the list can be printed, but changes cannot be made from the Print Preview screen.
 |
This letter can be used again and again by anyone at your institution using the CIM GOLD Mail Merge function.
Due to the nature of the Mail Merge function in Word, sensitive and personal information is only temporarily saved to a file on your computer until the preview screen is closed or the letters are printed. CIM GOLD then deletes the temporary file containing sensitive information.
Once a letter has been printed for accounts, "Mail Merge" will be displayed under the How Handled column on the Summary tab list view.
|
The following options affect mail-merge letters from queues:
1.Institution Option MSSN affects how Social Security numbers are printed on Mail Merge letters. When this option is set, the Social Security number will print with XX’s in the first five leading spots of the Social Security number and the remaining four numbers will print as normal.
2.After letters are printed, a note can be written in the Contact tab of the Loans > Marketing and Collections screen indicating that a mail-merge letter was sent to the account owner. To add this note to Comments, your institution must have an option selected on the Loans > System Setup Screens > Collection Institution Options screen. The option is called Contact Queues Write Notes to Collection Comments.
See the following example of the mail-merge letter comment:
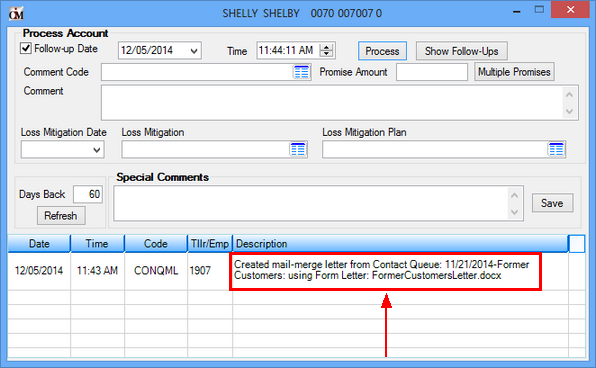 Comments Screen from Options > Show Collection Comments |