Printing and Saving Event Letters |
  

|
Navigation: Working with GOLD EventLetters >
Printing and Saving Event Letters |
|
The following steps explain how to print and save your finished event letters from GOLD EventLetters.
1.Select "Print Event Letters" from the Functions menu. You can also click the Print Event Letters icon found on the toolbar. ![]()
The Print Event Letters screen will appear displaying three windows of letters (see following example):
•Events To Be Printed
•Events that Have Been Printed
•Archived Events
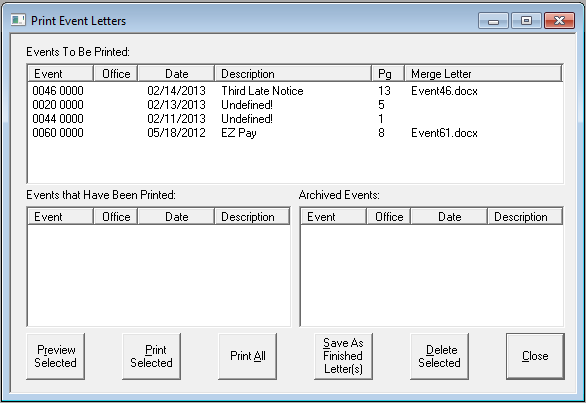
Note: In the example above, see how the Description for two letters is "Undefined!" That means those events have not be assigned to a merge letter. See Assigning Merge Letters to Events to complete these steps and eliminate the Undefined! error.
2.To preview event letters, highlight the line item from the Events To Be Printed window, then click the <Preview Selected> button.
A preview of the letter in Microsoft® Word of what is to be printed will appear. (Letters can only be previewed from the Events To Be Printed list.)
 |
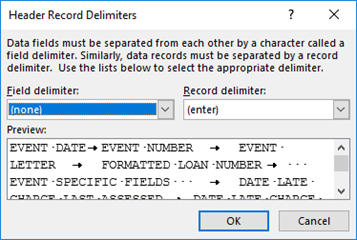
Tip: If you get the following message in Word after clicking <Preview Selected>,
Do the following:
1.From the Field delimiter field, select "Tab." 2.From the Record delimiter field, select "(enter)." 3.Click <OK>.
This error is a Word error that usually no longer appears after designated the above fields. |
|---|
WARNING: To close this window, you must click on the <Go Back> button located in the upper-right corner of your Preview screen, as shown below.
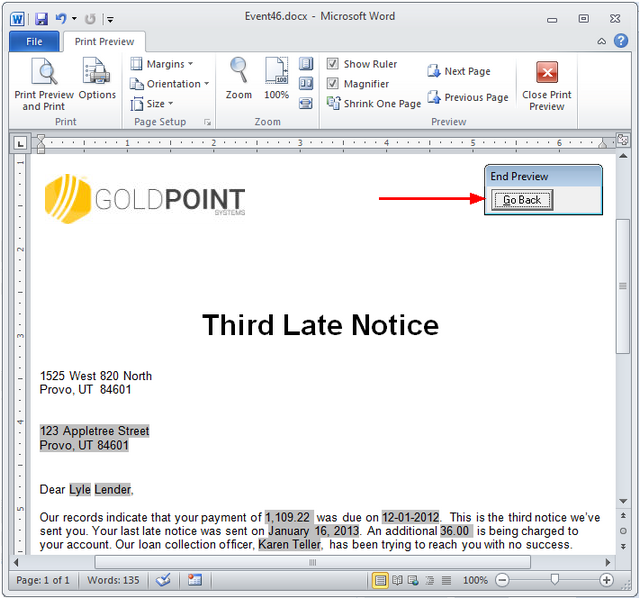
3.Click <Go Back> and click <Save As Finished Letter(s)> on the Print Event Letters screen. Microsoft® Word will automatically open again displaying the final merged letter.
Microsoft® Word automatically merges the data from GOLD EventLetters with a letter you previously set up in Word. Refer to Tying Data Source Files for more information.
4.Save the finished merged letters in the ToBePrinted folder by choosing “Save As” from the File menu in Microsoft® Word. The ToBePrinted folder is located at:
C:\Program Files (x86)\FPSGOLD\GOLDEventLetters\EventLetterFolders\HaveBeenPrinted
Be sure to enter the name of the letter or group of letters in the drop-down File name field, as shown below. For example, you should enter “02-15-13 3rd Late” which represents the third late notice letters from February 15, 2013. We recommend that you put the date first and then the description so that the saved letters will sort in order by date within folders. See the following example:

Click to expand.
5.Click <Save> to save your entry.
6.Click <Go Back> to return to the GOLD EventLetters program.
7.Select the event(s) you want to print letters for in the Events To Be Printed list, then click <Print Selected> to print all the letters to your customers.
Once printed, the event will be displayed in the Events that Have Been Printed list, as shown below:
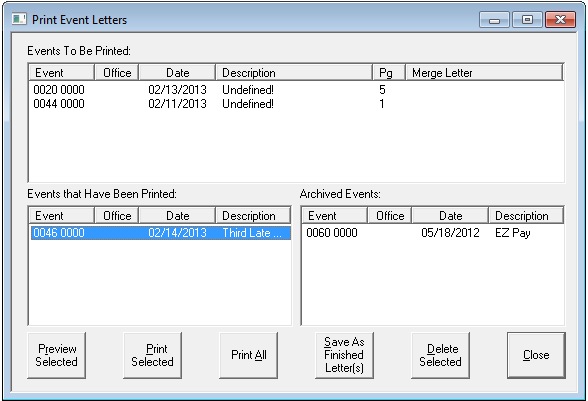
Any item in any of the three lists shown on the Print Event Letters screen can be moved from one list to another simply by clicking on the event and dragging it into a new list.
The system will place a log file of the printed event in the HaveBeenPrinted folder on your C: drive. If you move items to the Archived Events list, the system will move the log file to the Archived Events folder on your C: drive.