Navigation: File Services Plus > Settings > Image Options field group > Vaulting >
Starting with CIM GOLD version 7.21.2, the File Services Plus vaulting feature and its settings will no longer be accessible in CIM. These settings will instead be managed for each institution via GOLDPoint Systems' Application Portal. This portal is not available to most users, so the setup and maintenance of vaulting/watermark settings will primarily be carried out by supervisors and GOLDPoint account managers.
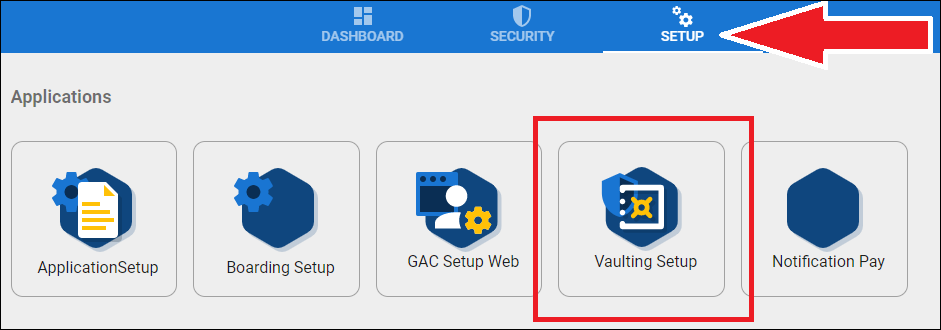
Users with the proper access will find the Vaulting Setup application under the Setup tab of the Application Portal, as shown below:

Vaulting Setup in Application Portal
The main screen that appears when Vaulting Setup is accessed displays a list of all previously created watermarks at the institution (see below). The list can be searched using the search bar at the top of the list. New watermarks can be created by clicking <Create New>. Existing watermarks can be deleted or edited by clicking the dots to the right of each item in the list.

Watermark List in Vaulting Setup
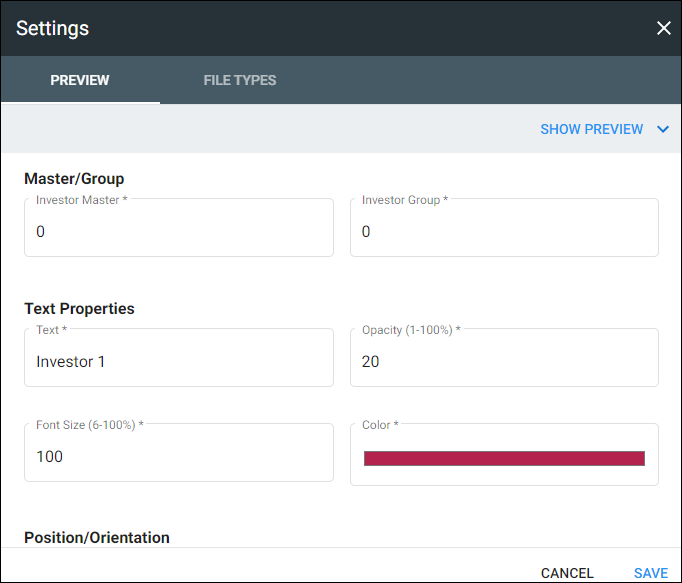
When a new watermark is being created or an existing watermark is being edited, the Settings dialog is used. The Preview tab of this dialog (see below) is used to indicate the following information:
•An Investor Master/Investor Group combination. Note that only one watermark can be set per master/group combination.
•The verbiage of the watermark (“GOLDPoint Bank,” “Copy,” “Bank Owned,” etc).
•The Size, Opacity, and Color of the watermark text.
•The Vertical (top/center/bottom) and Horizontal (left/center/right) position of the watermark text on each page.
The <Show Preview> button at the top of this tab displays a sample document showing how the watermark will appear with the current settings.

Preview tab of Settings Dialog
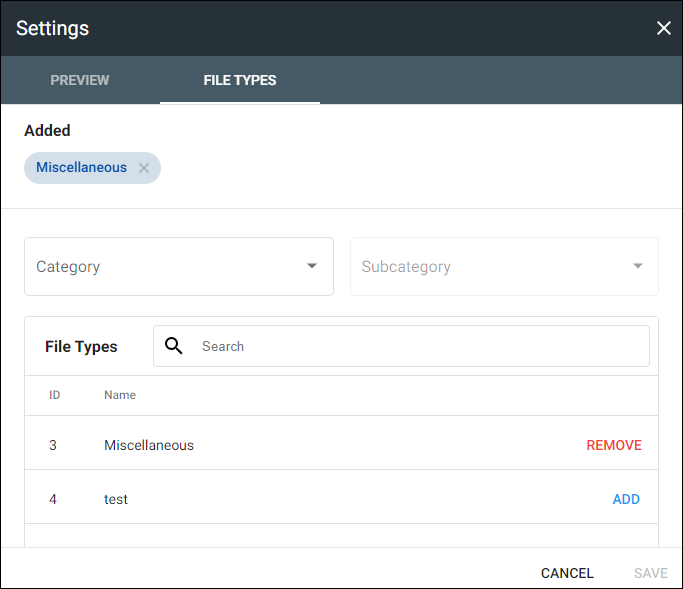
The File Types tab on this dialog (see below) can be used to further classify watermarks by institution-defined file type (as set up in File Services Plus). Use the Category and Subcategory search fields to narrow the list of file types if necessary. Click <Add> to apply the file type to the watermark settings, or click <Remove> to take it off.

File Types tab of Settings Dialog
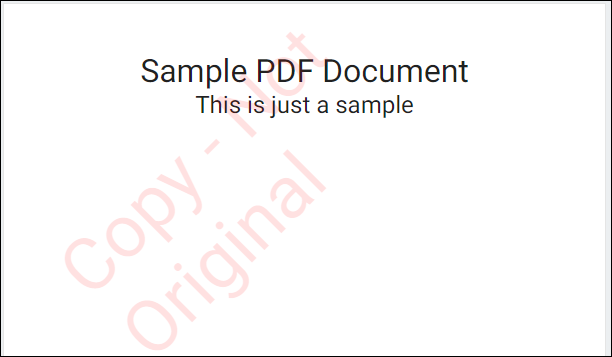
Once these settings are saved, watermarks will be applied to all attached documents at the institution that match the indicated master/group and file type settings. From then on, if a user has not been granted proper security access to view original documents (for example, if an investor accessing the Investor Portal does not have Vaulting clearance), all documents accessed by that user will be stamped with the watermark (which will read diagonally; see example below).

Watermark Example