|
Available Print Field Labels list view |
  

|
Navigation: Deposit Screens > Check Printing Screen Group > Check Format Setup Screen >
Available Print Field Labels list view
|
Available Print Field Labels list view |
|
Items in this list view are used in conjunction with the Check Format grid at the bottom of the screen. The fields in this section are the fields that are available to be placed on a check, and they can be dragged and dropped into the Check Format grid. The fields in this box are all available for all types of deposit account checks. Fields and field names are defined by GOLDPoint Systems.
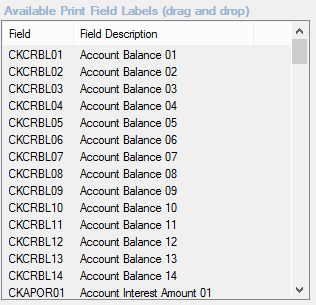
To place a field on the check, drag and drop the field from this section to the Check Format grid below. You can use any or all fields and can use them multiple times on the same check. For example, you may want certain data such as the check amount to be printed on the top section of the check and again on the lower section (stub). Hint: Use the <Shift> or <Ctrl> keys to select multiple fields and drag them all at one time.
As you are placing data on the check, be sure to allow for margins, logo, signature lines, and MICR line. You can view the check format by clicking <Print Preview> or using the <Print Test> button to print a test check.
Right-clicking on fields placed in the grid brings up the Sizeable Label Properties dialog (see example below). You can use this dialog to change the size, font, alignment, and color of the text in the fields.
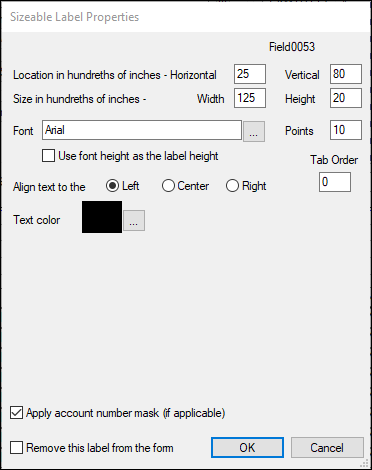
Marking the Remove This Label from the Form field will delete the field. You can also remove a field from a check by clicking on the field and pressing the <Delete> key.
Available Fields
The following paragraphs describe the fields available for deposit checks.
Check Date |
This is the date the check data was created. |
Check Description |
This is the description of the type of check being printed, e.g., Reserve Disbursement. |
Check Number |
This is the system’s number for the check and can be up to 8 digits long. Normally, you would enter the same number as the pre-printed number on the check. As each check is printed, the system increments the check number by one.
Regardless of whether you are using pre-printed checks with pre-assigned check numbers or you are having the system automatically assign a check number, it is a good idea to also print the check number somewhere on the check and the check stub.
There is an institution option (UNAC) that must be set to have the system automatically assign check numbers. In addition, to use the automatic assignment of check numbers, be sure to coordinate this with the GOLDPoint Systems Financial department. |
MICR Line Data |
This is the routing transit number for your institution. If you are not using pre-printed checks, you must place this on the check where the MICR line will be printed. Before you can use this feature, you will need to have the correct type of check paper and a printer that is capable of printing MICR data.
See MICR Information for more details. |