Designating Tellers on the Teller Information screen |
  

|
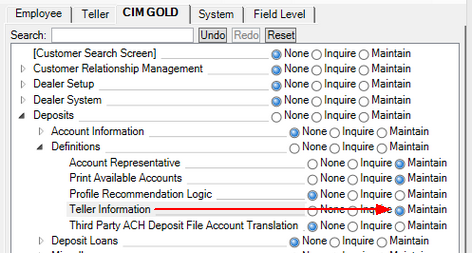
Navigation: Security Screens > Setup Screen > Teller Information Screen >
Designating Tellers on the Teller Information screen |
|
Adding new tellers and making changes to these records on the Teller Information screen requires file maintenance security. Security access to the Security > Setup menu item on the CIM GOLD tab is also required, as shown below.
To allow employees to only change limits and teller cash drawers, assign them file maintenance security on the Teller Information screen but none on the Security screens. Branch personnel will not be able to add new tellers but can update some data.
A teller’s data cannot be changed if the teller is currently signed on to GOLDTeller, as shown below:

Three days of totals are stored continuously for each teller, as displayed on the Current Totals, Last Signoff, and Previous Totals tabs.
An Employee Number Record must also be created for the teller on the Setup screen.
Follow the steps below to learn how to set up an employee as a teller. If creating a new teller from the Teller Information screen, skip these first two steps. See help for the Teller Detail and Monetary Limits field groups for more information about the fields mentioned in these steps.

Steps to Create New Teller
1.On the Setup screen, select the Tellers radio button. (Remember: skip this step and the next one if creating a teller from the Deposits > Definitions > Teller Information screen.)
2.On the Setup screen, select the Teller tab.
3.Click ![]() .
.
4.Enter the Teller Number and Employee Number. These numbers must be the same.
5.Enter the full name of the employee in the Name field.
6.Enter the Office number where the teller will mainly process transactions. If the teller will be working from more than one office, select the Other Office Signon option.
7.Enter the Security Level you want to assign the teller.
8.Mark the Other Office Signon and/or ATM Teller fields, if applicable.
9.Enter the Monetary Limits and Override authority. The defaults for these fields are 999,999,999.99. If the default is used, no overrides will be required.
10.If you want the teller to receive a message any time their cash drawer goes above a certain amount, enter that amount in the Give Warning If Net Cash Exceeds field.
11.Click ![]() . The teller will appear in the Teller Information list view.
. The teller will appear in the Teller Information list view.
The employee can now process transactions in GOLDTeller or on various screens in CIM GOLD. Selecting a teller in the Teller Information list view list view populates the other fields on the Teller Information screen with that teller's information and makes them available for editing (except Teller Number).
See also: