Navigation: Miscellaneous Screens > Security Reports Screen >
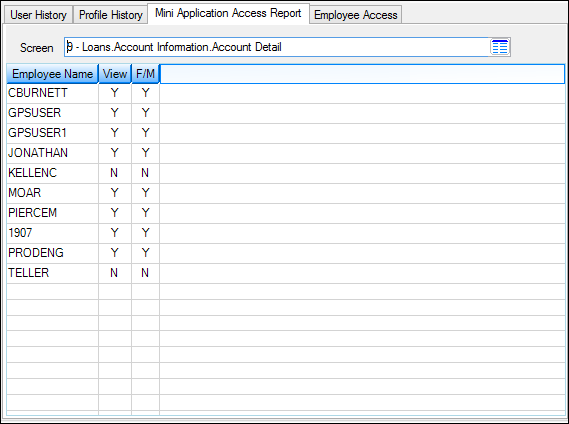
The Mini Application Access Report tab on the Miscellaneous > Security Reports screen is useful in determining who at your institution has access to specific screens in CIM GOLD. Once you select a screen from the Screen field, the table below the field displays all the employees set up on the Security > Setup screen and what type of access they have for that screen. This security is for the Security > Setup > CIM GOLD tab.
Possible options are:
•View: This means the employee or profile has inquiry access only to the screen. They can view the information on the screen, but they cannot change any information. A "Y" in this column indicates a "yes" for the employee to view the screen. An "N" means the employee or profile does not have access to view the screen.
•F/M: This means the employee or profile can access the screen and make changes to any information on it (unless field-level security restricts it).
Employee access to CIM GOLD screens is granted on the Security > Setup screen, and CIM GOLD screens available at your institution are designated on the Security > Subscribe to Mini Applications screen.
|
Note: If you want to view which screens a particular employee or profile has security for, see the Employee Access tab. |
|---|

Miscellaneous > Security Reports Screen > Mini Application Access Report Tab
Printing the Report
You can print Mini-Application Access Report information by right-clicking on the table on this tab and pressing <Ctrl> + P. This will print the Mini-Application Access report to your default printer. Or you can select any of the possible right-click options:
Edit |
Use this menu to copy cell data (or select all cell data to be copied). Once list view data is copied, it can be pasted into another program (such as Microsoft® Excel. |
Printing |
Use this menu to print information from a list view. Printer/paper setup, print previews, page orientation, and margin settings can all be set from this menu. |
Export |
Use this menu to export the list view directly to another file or program. The three possible export choices are:
•Export to Report Manager: Select this function to export the data in the list view to the GOLDPoint Systems Report Manager program. •Export Selection to Tab Delimited Text File: Select this function to save the selected portion of the list view as a tab-delimited text file. Any tab-delimited program (or even Microsoft® Word, Wordpad, or Notepad) can then be used to review the selection. •Export All To Tab Delimited Text: Select this function to save the entire list view as a tab-delimited text file. Any tab-delimited program (or even Microsoft® Word, Wordpad, or Notepad) can then be used to review the selection. |
Auto Resize |
Use the this menu to resize the list view table in order to display all data. The three possible resize choices include:
•Auto Resize Grid: Resizes the entire list view (both columns and rows) to fit the data. •Auto Resize Columns: Resizes columns only. •Auto Resize Rows: Resizes rows only. |
Find |
Use this function to enter terms to use in searching the list view table. After <Find> is clicked, the system displays all matching information in a table. Select an item in the table to be redirected to that item in the original list view table. |
See also: