Attach Bulk Files |
  

|
Navigation: File Services Plus >
Attach Bulk Files |
|
The Attach Bulk Files screen is used to attach large numbers of files to multiple customer accounts at your institution. It can be accessed from the File Services Plus drop-down menu in CIM GOLD. To attach a small number of files to a selected customer account, use the Attach File screen instead. This screen is accessed from the File Services Plus drop-down menu in CIM GOLD.
|
Note: An option must be set by GOLDPoint Systems in order to upload a batch file. Additionally, a one-time fee is required before your institution can use this feature. Contact your GOLDPoint Systems client solutions specialist if your institution is interested in this feature. |
|---|
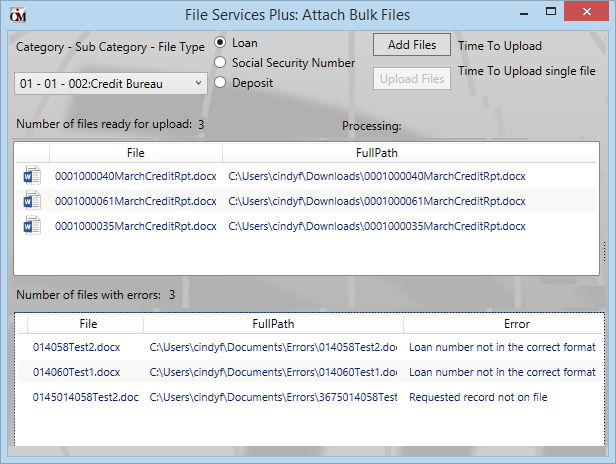
File Services Plus > Attach Bulk Files Screen
If any errors exist during the upload, the system will display the errors, as shown in the example above. If the account number is not in the correct format, you will receive errors. See File Naming Rules below for information about naming rules.
Follow the steps below to upload a batch of files using this screen:
1.Use the File Type field to indicate the type that files in the selected batch will be designated as. The file types are set up by GOLDPoint Systems.
2.Use the radio buttons at the top of the screen to indicate whether the system will organize and distribute the batch of files by Loan account number, Social Security Number, or Deposit account number.
|
WARNING: All files selected for uploading must include a number at the beginning of each file name that corresponds to the appropriate customer or account. If the Loan or Deposit radio button is selected, these numbers must be valid account numbers. If Social Security Number is selected, these numbers must be valid Social Security Numbers. See File Naming Rules below. |
|---|
3.Press <Add Files> to browse the user computer for the files or folders to upload.
4.Once the desired files or folders are selected, the system will process the files. The top list on this screen displays all files that are ready for uploading. In order to appear in the top list, a file must contain a valid account or Social Security number at the beginning of its file name, depending on which radio button was selected (as explained in step 2 above). The bottom list on this screen displays all files that cannot be uploaded because their file names contain an error. Use the bottom list as reference to locate and rename files on the user computer (or else use the Attach Files screen to upload any remaining files).
5.More files can be added to the top list by pressing <Add Files> again. Otherwise, press <Upload Files> to upload all files indicated in the top list. Once the process is complete, the system displays total Time To Upload and average Time to Upload single file information at the top-right of this screen.
•Files pertaining to loan accounts must contain the 10-digit loan account number (no spaces or dashes, 4-digit office, 6-digit account) at the beginning of the file name. For example, Branch 2 Account 10 would be written as "0002000010" at the beginning of the file name.
•Files pertaining to deposit accounts must contain the 14-digit deposit account number (no spaces or dashes, 4-digit office, 10-digit account) at the beginning of the file name. The Check Digit is not considered a part of this account number. For example, Branch 3 Account 12 would be written as "00030000000012" at the beginning of the file name.
•Files designated for attachment by Social Security number must include the full SSN at the beginning of the file name (no spaces or dashes).
|
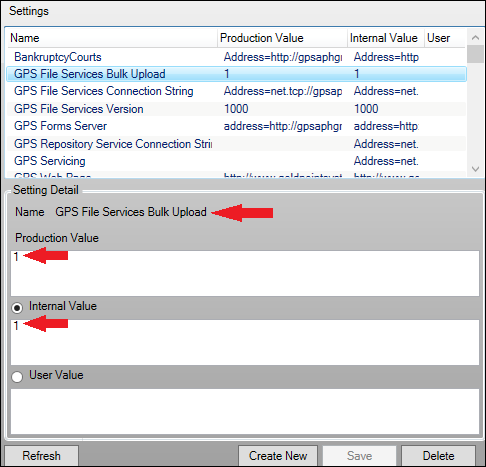
GOLDPoint Systems Only: In order to allow uploading batch files, you must add a new configuration to the Configuration Manager screen. The new configuration should be named “GPS File Services Bulk Upload”, and you should enter “1” in the Production Value and Internal Value fields (see example below).
Once the configuration has been set up, users will need to close CIM GOLD then open it again in order to view the Attach Bulk Files selection from the File Services Plus drop-down menu.
 |
|---|