Navigation: Loans > Loan Screens > History Screen >
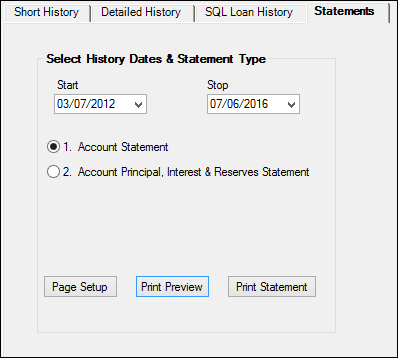
The Statements tab on the Loans > History screen allows you to print a loan statement for the account selected.
Select history dates to display on the statement, then select either a standard Account Statement or an Account Principal, Interest & Reserves Statement.
See the following example of this tab.

Loans > History Screen > Statements Tab
Use the Start and Stop fields to select the date range for the statement.
Two statement types are available:
1.Select the Account Statement radio button if you want to print a regular statement that shows all payments made to the account, all late charges assessed and waived, and the due date of the next regular payment.
2.Select the Account Principal, Interest & Reserves Statement radio button if you want to print the statement in a more summary view that quickly shows the principal, interest, and reserve balances for each loan activity (generally on a single line). On this format, when a late charge is paid, it appears in the principal column because a separate column is not available for late charges. All miscellaneous items that are not principal, interest, or reserve will appear in the principal column on the simplified statement.
See these examples of the two types of statements:
Example of Account Principal, Interest & Reserves Statement
Once you select the date range and the type of statement, click ![]() to view the statement before printing it. You can print the statement from the preview screen, or you can click
to view the statement before printing it. You can print the statement from the preview screen, or you can click ![]() to print the statement directly to a printer of your choosing.
to print the statement directly to a printer of your choosing.
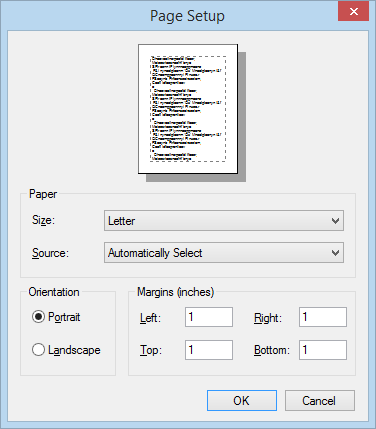
Clicking ![]() allows you to set up the formatting for the statement. Use this dialog box to select whether you want the statement printed in landscape or portrait (default), what margins you want for the statements, and the size of the paper you want to use, as shown below:
allows you to set up the formatting for the statement. Use this dialog box to select whether you want the statement printed in landscape or portrait (default), what margins you want for the statements, and the size of the paper you want to use, as shown below:
