Navigation: Queues > Queue Screens >
Use the Ad Hoc Letters screen under Queues in CIM GOLD to create mail merge letters for your customers. As the name implies, these are ad hoc letters set up by your institution to be sent to customers for whatever reason you need.
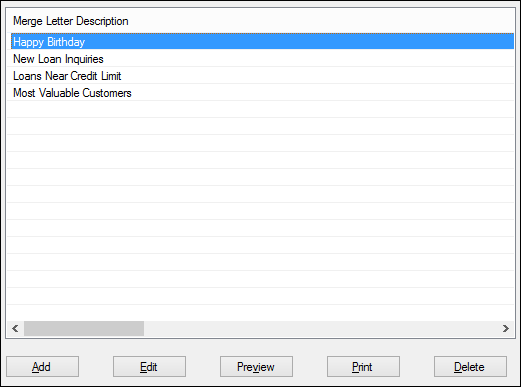
The following is an example of this screen:

Queues > Ad Hoc Letters Screen
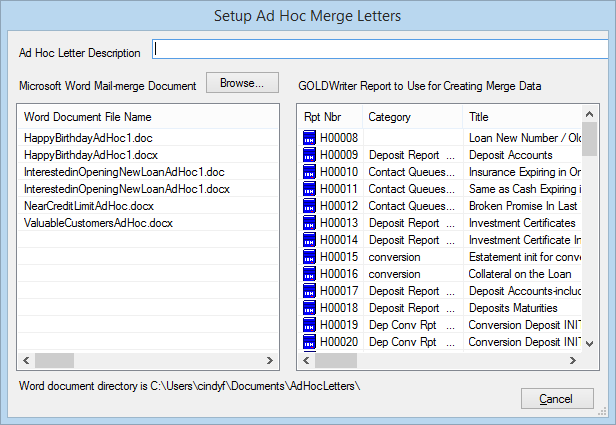
When you first enter this screen, a list of already created merge letters appears. You can add merge letters to this list by clicking <Add> at the bottom of the screen. Then the following screen appears:

To create a mail merge letter, a report containing the information for the letter must first be created in GOLDWriter. As you can see from the example above, the system pulls over any GOLDWriter report that has been created and displays it in the right column. The left column contains the actual Microsoft® Word file with the letter including merged fields. See Create a Mail Merge Letter for more information about this process.
You will need to click the <Browse> button and find the folder where your ad hoc letters are saved.
Select any mail merge letter in the list view and click <Edit> to edit it. Click <Print> to automatically print selected letters, or click <Preview> to first preview the letter before printing it.
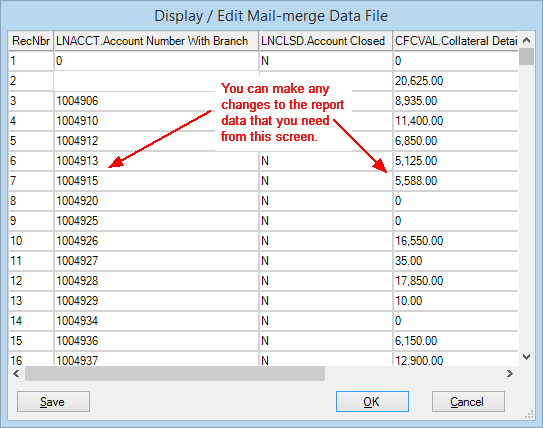
When you print or preview letters, GOLDWriter will automatically run the report to compile a list of accounts for this letter. The report will appear in CIM GOLD in a pop-up screen, where you can manually make any changes to the data that you need to before the data is inserted into the merged fields in the letter, as shown below:

Each time a letter is selected and <Print> is clicked, the GOLDWriter report will be re-run and the new information will be inserted into the Word mail merge fields before printing.
In order to use this screen, your institution must:
•Subscribe to it on the Security > Subscribe To Mini-Applications screen.
•Set up employees and/or profiles with either Inquire (read-only) or Maintain (edit) security for it on the CIM GOLD tab of the Security > Setup screen. |