Navigation: Dealer System > User Groups Screen >
Use the User Groups screen to set up user groups and update current user groups. User groups allow you to place a number of users into a group and select relationships that will automatically be associated with all the users put in that group. This allows you to change the relationships for a large number of users quickly and effectively.
Before you can make changes to a user group, you must first select the user group from the User Groups list view. Once a user group is selected, the fields in the User Group Details field group become active. The User Group Details fields also become active when you create a new user group.
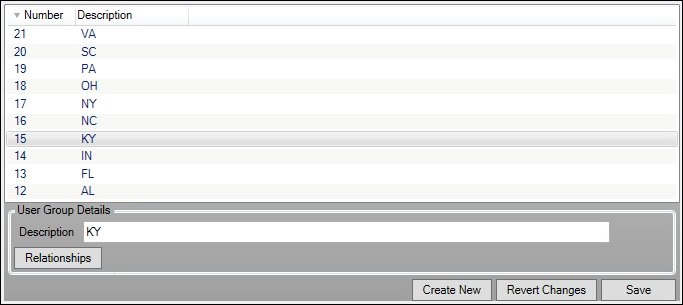
See the following example of this screen followed by field and button descriptions.

User Groups Screen
Field |
Description |
|---|---|
This list view displays all the user groups set up for your institution. If you click on a user group listed in this list view, detailed information for that user group appears in the User Group Details field group below the list view.
This list view displays the following columns, which can be used to sort: •Number: Displays the number of the user group. These numbers are automatically assigned as the user groups are created. •Description: Displays a description of the user group. |
|
Enter a description of the user group in this field. Try to make the description of the user group reflect its function. For example, if you create a user group that can be used for all users in Utah, you could enter "Utah."
To make this field active, you must first select a user group from the User Groups list view or click <Create New> to create a new user group. |
Button |
Description |
|---|---|
Click this button to add and remove the plans, dealers, application types, etc. attached to a user group. |
|
Click this button to create a new user group. |
|
Click this button to remove any changes that you have made. |
|
Click this button to save any changes that you have made. |
See also: