Navigation: Teller System > CIM GOLDTeller Overview > CIM GOLDTeller Screen Details > Functions > Administrator Options > MICR Check Printing >
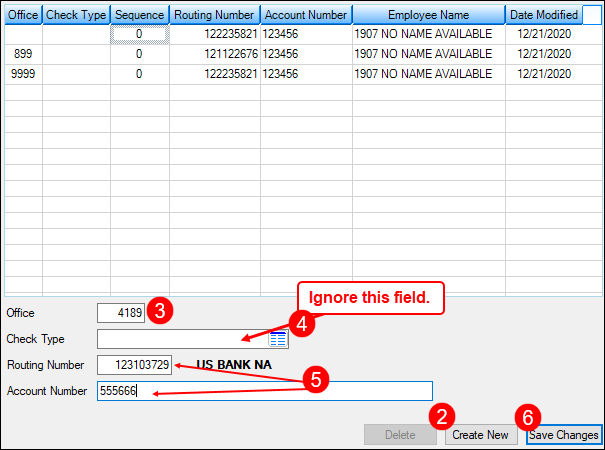
Using the GOLD Services > Office Routing Info screen, connect the office or branch to the MICR line. These fields are used by Check Writer to populate the routing number and account number for the MICR line, which is explained in the Part 2: Create the MICR Check Format topic. You can set up each office and branch to have a different routing and account number.
To set up the office and routing number:
1.Access the GOLD Services > Office Routing Info screen.
2.Click <Create New>.
3.Enter the Office number to add the office and routing number in the provided field.
4.Do not enter anything in the Check Type field. This is a future enhancement that has not yet been released to CIM GOLD.
5.Enter the Routing Number and Account Number of the bank or institution used by your institution for checks.
6.Click <Save Changes>. See the following steps.

GOLD Services > Office Routing Info Screen