The Report Wizard Step 1: Enter Basic Information |
  

|
Navigation: How to > The Report Wizard >
The Report Wizard Step 1: Enter Basic Information |
|
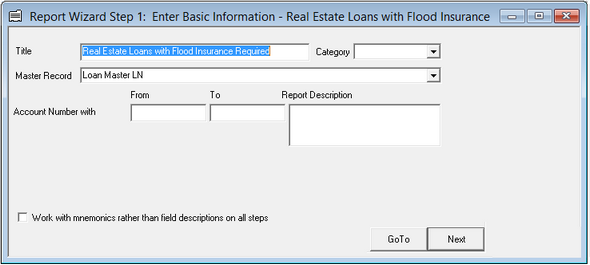
The first step of the Report Wizard is to enter basic information about the report. After clicking the Report Wizard icon, the Report Wizard Step 1 screen is displayed, as shown below.
The following steps explain how to complete Step 1 of the Report Wizard.
1.In the Title field, type whatever name you want to give the report.
| The title appears on the Report Catalog and should be explanatory if other users will use the report. |
| 2. | In the Category field, type the category, or choose a previously entered category from the drop-down list by clicking the down arrow. |
| The category is defined by your institution, and is used to group reports together by type of report, by master file, by department, etc. You can type anything you want (including nothing at all) for a report category. It also appears on the Report Catalog and can be very useful to your institution in separating departmental reports. |
| 3. | Choose a Master Record from the drop-down list by clicking the down arrow. |
| After choosing a master record, new fields will appear just below the Master Record field. The fields that appear will be different according to the master record you choose. |
| The master record will also determine what other records can be used together on the report. The master or main record will be the fields you will base your criteria and selection on. |
| 4. | Enter the Account Number From and To information if you want to limit the extent of the report to a specific range of account numbers. |
 |
Tip for Loans: To place the branch portion of the account number into a separate column, use LNOFFC then LNACT6. (This will place the 4-digit office in one column and the 6-digit loan number in a separate column.) If you want to include the check digit, use LNCKDG; this would place the check digit in a separate column. Example of a loan number is 0014-512345-07. |
|---|
|
Tip: If you want to run a report against a small number of accounts as a test run, you would only need to enter a small range of account numbers in these fields. See View How Much a Report Costs to Run for more information about setting up test runs. |
|---|
| 5. | To the right of the From and To fields is the Report Description field. Enter any notes you would like to leave about the report (such as the purpose or when it should be processed) in this field. This information will only show in the Report Wizard. |
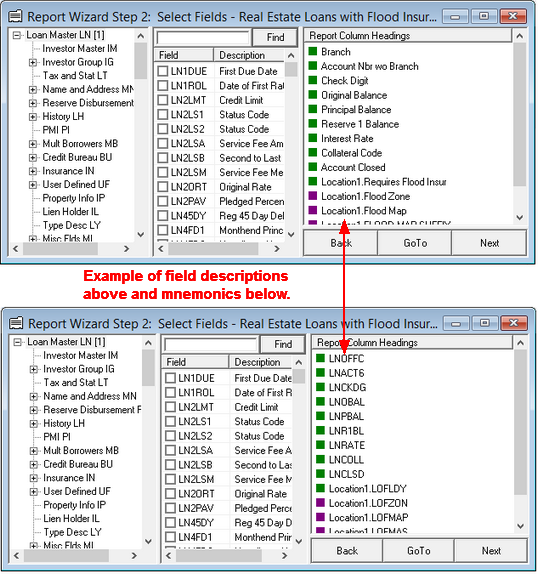
| 6. | If you would rather see mnemonics than field descriptions, check the Work with mnemonics rather than field descriptions on all steps box. If you check this box, mnemonics will be used in all subsequent steps of the Report Wizard. See the following example of mnemonics verses field descriptions: |
When you have finished entering your information, click <Next> at the bottom-right of the screen. Step 2 of Report Wizard will appear.