Navigation: GOLD EventLetters Setup Procedures > Tying Data Source Files >
It is possible to create two or three event letters per page (commonly known as 3-up event notices) by completing the following steps.
1.Create section 1 by following steps 1-8 in Tying Data Source Files.
Note: You must have version 1.1.2 or higher of GOLD EventLetters to print 3-up letters.
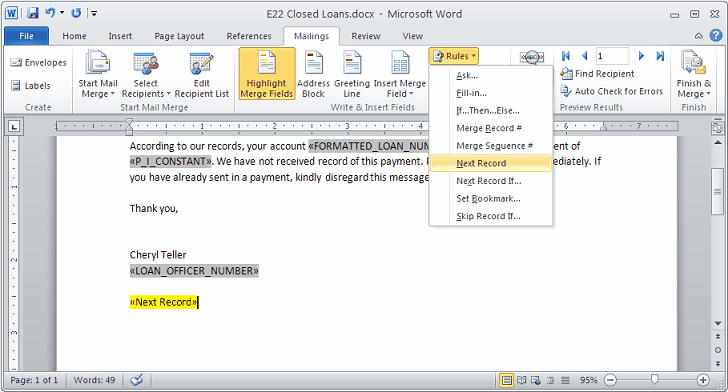
2.On the line above where you want the second and third sections of the 3-up notice to appear, put the <Next Record> merge field in your document in Microsoft® Word. This indicates the end of section 1 and the beginning of section 2, and the end of section 2 and the beginning of section 3.
To insert a <Next Record> field into your letter, on the Mailings tab, click Rules, and then select "Next Record" (as shown below).

3.Copy and paste the information from section 1 into section 2.
4.Insert another <Next Page> break from the Rules drop-down list, and then paste the information from section 1 into section 3.
| Use perforated paper to separate the notices easier. |
For an example of a finished 3-up letter, see Example of 3-up Letter.