Navigation: File Services Plus > Export Bulk Files >
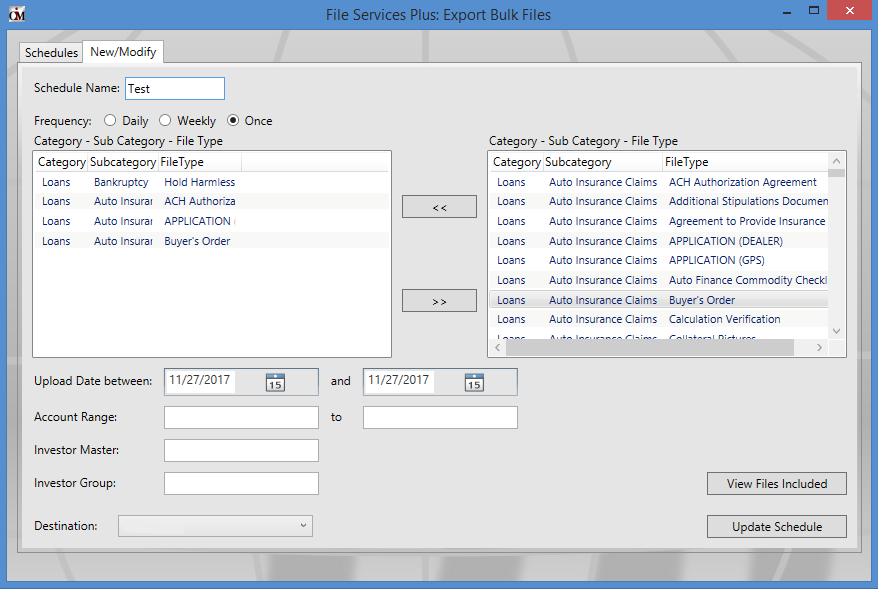
Use this tab to create or edit export schedules. This tab can be used in a few different ways:
•If this tab is accessed normally, it will be used to create a new schedule.
•If a schedule was double-clicked in the top list on the Schedules tab (or the user right-clicked a schedule and selected Modify), this tab will be used to edit an existing schedule.
 |
Note: Only schedules that have not yet run are able to be modified. Once a schedule has run once, the only way to adjust it is to delete it and create a new one. |
|---|
•If the user right-clicked a schedule in the top list on the Schedules tab and selected Copy, this tab will be used to create a new schedule by copying information from an existing schedule. This tab will open with the selected schedule's information populating the fields. The information can then be edited and the new schedule can be given a unique name.
To view a list of all files currently attached to the schedule, press <View Files Included>.

To create or edit an export schedule, follow the steps below:
1.Indicate a Schedule Name and Frequency (Daily, Weekly, or Once).
2.The right list on this tab displays all file categories available for export at your institution. File categories are determined by combinations of Category, Sub-Category, and File Type as indicated on the Attach Files screen. The left list displays all file categories that have been added to the export schedule. Use the arrow buttons (located between the lists) to add/remove all necessary file categories to/from the left list. Multiple file categories can be selected and moved at once.
3.Indicate the Upload Date range and, if necessary, the range of Account numbers that will be included in the export schedule. To include documents from all accounts, leave the Account Range fields blank.
4.Indicate the Investor Master and Investor Group numbers if it is necessary to limit the export schedule to only documents from accounts within a specific master/group. To include documents from all accounts, leave these fields blank.
5.Indicate the export location. This location must be set up by GOLDPoint Systems before this feature is available at your institution.
6.Once the Schedule Name and Destination have been indicated and file categories have been added to the left list (as explained in the previous steps), the <View Files Included> button will be available. Press this button to view a list of all files that will be included in the next run of the export schedule.
7.Click <Create Schedule>. The export schedule will appear in the top list on the Schedules tab and become active.